The Contact Groups tab
PERMISSIONS Security level with access to CRM, and Edit All or Edit Mine permission for associated organization.
NAVIGATION Left Navigation Menu > CRM > Search > Organizations > click Search > click an organization name > accessory tabs > Contact Groups
NAVIGATION Left Navigation Menu > CRM > Search > Organizations > click Search > click an organization name > accessory tabs > Contacts > click a contact > Contact Groups
NAVIGATION Left Navigation Menu > CRM > Search > Contacts > Contact (Last Name) or Contact (First Name) or Contact (Email) > click a contact > Contact Groups
BEFORE YOU BEGIN This article explains how to add individual contacts to groups from Organization or Contact pages. To manage multiple contacts across organizations, refer to Adding members to a contact group.
The Contact Groups tab appears on the accessory tabs of the Organization and Contact pages. It displays all group memberships for the organization's contacts or the selected contact. You can manage the membership of individual contacts from specific organizations from this location.
To open the page, use the path(s) in the Security and navigation section above.
The button bar contains the following options:
| Option | Description |
|---|---|
|
Add Contacts to Group |
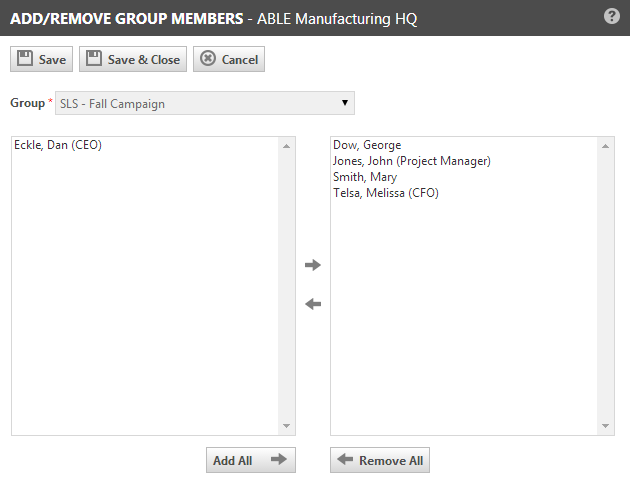
Click this button to add a contact to any active group in your Autotask instance. The group does not have to appear on the list of groups already associated with organization contacts.
The Add/Remove Group Members page opens. All contacts from the current organization appear on the left.
If any contacts from the current organization already belong to the group, those contacts move to the right side.
|
|
|
PERMISSIONS By default, Export is available to users with Admin security level and disabled for all others. It can be enabled for other security levels. Refer to Can export Grid Data. NOTE When exporting to CSV: To ensure consistent date/time formatting in the CSV output, we strongly recommend that the user’s date/time format settings in Autotask be identical to the Windows date/time format settings of the computer performing the export. This will prevent conflicts in how the software that generates the report interprets the date/time format.
NOTE Note that only the selected columns of the first 5,000 records will be exported. IMPORTANT The export file does not contain all fields that are required to re-import the data using the data import templates, and the data headers do not match. |
|
|
Click the refresh icon |
| Menu Option | Description |
|---|---|
|
Organization Group Members |
|
|
Add/Remove Organization Members (Organization page only) |
Opens the Add/Remove Group Members page. Contacts who are already members of the group appear in the right list.
Save or Save & Close. |
|
Email Organization Members (Organization page only) |
Organization page only. Selecting any of these options will open the Execute Contact Action for page, where you can create and send an email, or create a note or to-do for all contacts from the organization who are group members. Refer to Creating and executing contact actions. |
|
Create Note for Organization Members (Organization page only) |
|
|
Create to-do for Organization Members (Organization page only) |
|
|
Remove From Group (Contact page only) |
Removes the current contact from the selected group. |
|
Contact Group |
|
|
View |
Opens the Contact Group page. Refer to Managing contact group membership. |
|
Edit |
Opens the Edit Contact Group page, where you change edit the group name and change the Active status of the group. |


