Accepting or declining tickets
PERMISSIONS Outsource ticket recipient
NAVIGATION Left Navigation Menu > Outsource > Dashboard, and on the left menu, open the Received Work - Waiting Acceptance folder
NAVIGATION On the notification email, click Click here to accept or decline ticket to open the service partner's Accept/Decline Ticket view.
When a ticket is outsourced to you, you will receive an email notification, and the ticket is added to the Work Received: Waiting Acceptance list on the Outsource dashboard. You can review and accept or decline the ticket from either page:
- On the notification email, click Click here to accept or decline ticket to open the service partner's Accept/Decline Ticket view.
- In Autotask, navigate to Left Navigation Menu > Outsource > Dashboard and on the left menu, open the Received Work - Waiting Acceptance folder and click a ticket title.
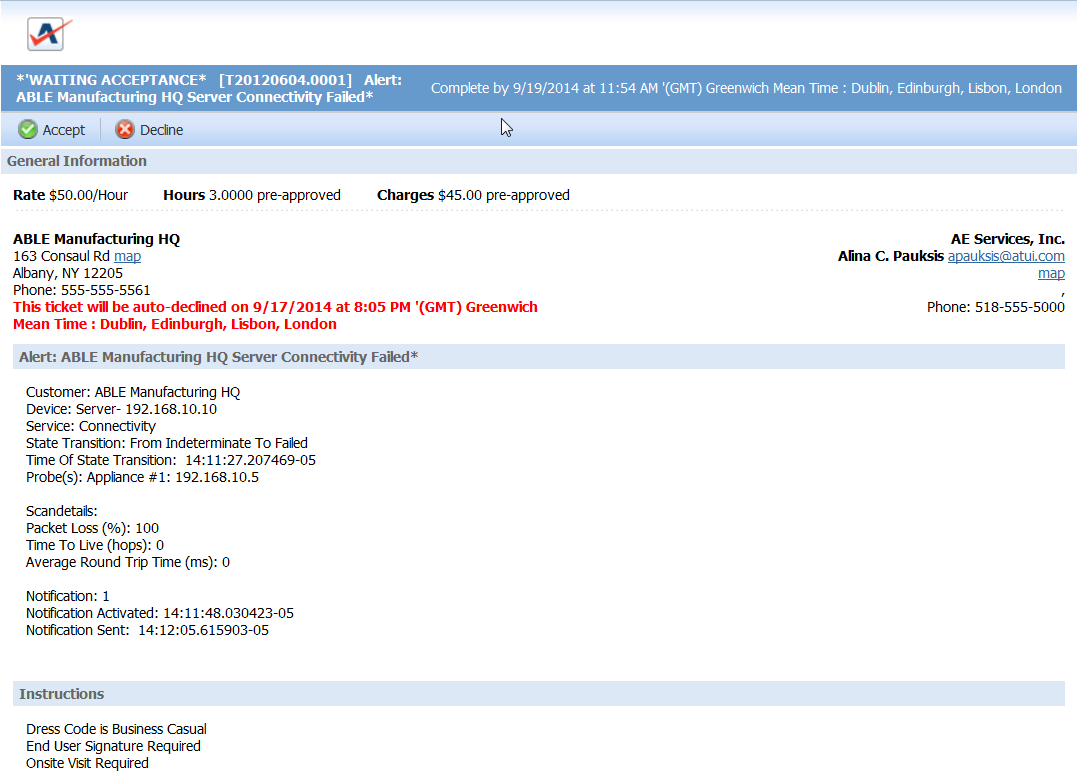
The Ticket Accept/Decline page opens.
About the Ticket Accept/Decline page
NOTE This page will look different from other Autotask pages. This page and the Accept/Decline dialog pages are styled like the Subcontractor Portal.
Ticket Information Description Ticket Heading: *Waiting Acceptance* The Ticket heading indicates that the ticket is waiting acceptance and provides the following information:
• The Autotask ticket number from the lead partner application. If you accept the ticket, your Autotask application assigns a new ticket number.
• The ticket title
• The Complete By date and timeAccept Click to accept the ticket. Refer to Accept and add the received ticket to Autotask. Decline Click to decline the ticket. Refer to Decline a ticket. Financial Information Provides the following information:
• Rate set by the lead partner. Rate can be per hour (50.00/hr) or a flat rate (500.00/flat).
• The authorized number of hours, when rate is per hour.
• The amount authorized for charges.Service Location Information Lists the organization name, address, and phone number for the organization location where service is required. Map Link Click to launch a map of the service location address in a new window. Lead Partner information Lists information about the partner that outsourced the ticket including partner name, contact name, address, and phone number. Automatic Decline Date/Time Indicates the date and time at which the ticket is automatically declined if the service partner does not accept or decline. Ticket Title and Description Provides additional descriptive information about the service call. Instructions Provides any additional information provided or specified by the service partner, including whether or not a site visit and/or signature are required.
IMPORTANT If you take no action, the ticket is declined automatically at the date and time specified in the email on the ticket detail view.
How to...
- To open the page, use the path(s) in the Security and navigation section above.
- To decline a ticket, click Decline on the Ticket Accept/Decline page.
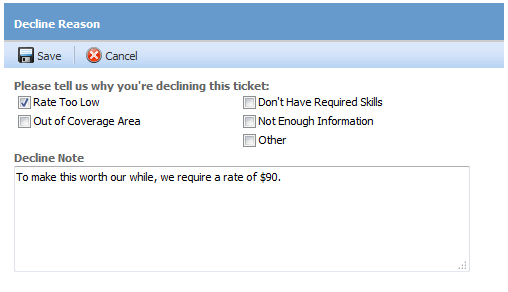
The Ticket Decline Reason dialog opens.
- Select one or more check boxes, type a note in the Decline Note field, or both.
- Click Submit.
When you accept an outsourced ticket, a new ticket is created in your Autotask instance that is synchronized with the lead partner's original ticket until outsourcing is complete.
- To open the page, use the path(s) in the Security and navigation section above.
- Click Accept on the Ticket Accept/Decline page.
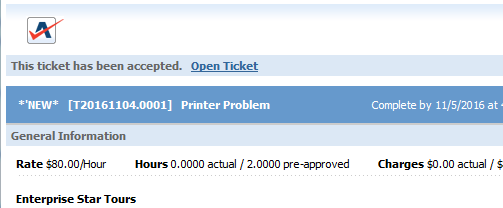
The Waiting Acceptance ticket view changes to New.
NOTE If this is the first time you have accepted a ticket from the lead partner, the Lead Partner Administration page opens to allow you to map the lead partner to an Autotask organization. Refer to Mapping a new lead partner.
The lead partner automatically receives notification that you have accepted.
- In the Accepted ticket view, click Open Ticket.
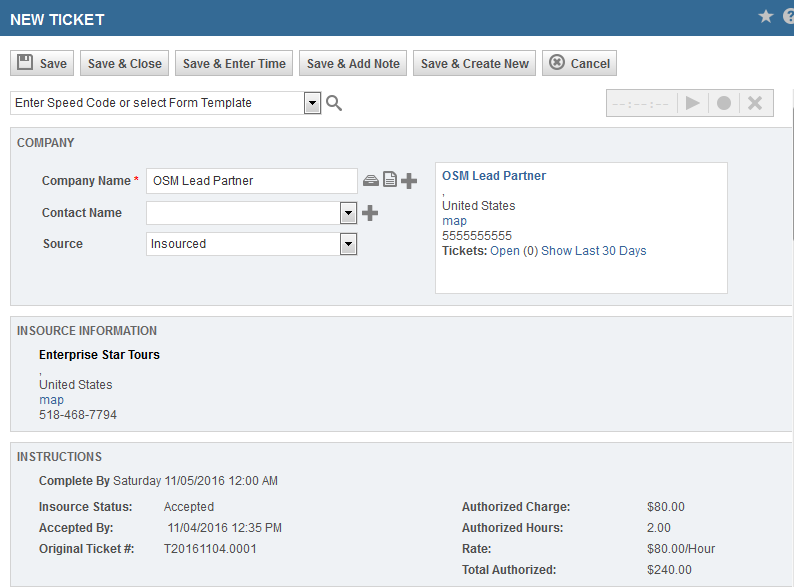
A New Ticket form opens in Autotask, with Insource Information fields pre-populated with information from the outsourced ticket.
IMPORTANT Double-check that the Organization Name field is populated with the name of the organization that outsourced the ticket to you. You will NOT be able to change it after you saved the ticket!
The New Ticket page for a received ticket is identical to the standard New Ticket page, with the following exceptions:
| Field/Area | Insource Content |
|---|---|
| Organization | The Organization fields are populated with the lead partner's organization information, but can be modified. NOTE In order to invoice the outsourcing partner from the Autotask billing system, the lead partner's organization name must appear in the Organization Name field. |
| Insource Information (read-only) | This section displays the end client organization information. |
| Instructions (read-only) | This area displays the instructions, requirements and terms provided by the lead partner, including the Complete by date, original ticket number in the lead partner's system, and rate information. Rate information is visible to users with outsource management permission only. |
| Ticket Information | Several fields in this area are populated with information from the outsourced ticket including the ticket title, description, due date and time, and estimated hours (set to the number of hours approved by the lead partner). These fields can be edited as needed. |
| Product Name | If the outsourced ticket specifies a device, that product appears as "Product Name:" in the ticket description. |
- Complete all additional fields that are required fields in your Autotask instance, and click Save to add the ticket as a received ticket. This ticket is assigned a ticket number from your Autotask instance.
IMPORTANT The new ticket will not be added to your Autotask instance unless you complete and save the New Ticket form.
Once you have saved the ticket, the following occurs:
- The Insource Status changes from New to In Progress.
- The ticket appears in all standard Autotask ticket lists as well as in the Outsource ticket lists.
- If you have added the optional Insourced column to your standard Autotask ticket lists, a check mark appears in that column.
TIP To add the Insourced column to your ticket lists, select it in the column chooser.
- While the insource status is In Progress, your ticket remains linked with the lead partner's original ticket, sharing notes, attachments, and time and charge information. Insource status changes impact both partner's tickets.
- You can manage the ticket as you would any Autotask ticket, for example, schedule the ticket for a service call, open the ticket detail, edit the ticket, change the ticket status, and add time and charges.
NOTE If you change the ticket status to Complete before the insource status is Complete, the insource status becomes Waiting Approval and the lead partner must approve the ticket. Ticket synchronization is suspended when the insource status is Waiting Approval.
- The Notify Lead Partner menu allows you to submit questions to the outsourcing (lead) partner and, when the service is complete, select Insource Complete to submit the ticket for approval by the lead partner.


