The Approvals tab
PERMISSIONS Service Desk object permissions to add and edit tickets.
NAVIGATION Left Navigation Menu > Service Desk > Search > Tickets > click Search > open a ticket. The ticket must be a change request ticket.
The Approvals tab appears only on tickets of type Change Request. On this tab, you define and track the approval/rejection process for a change request ticket. Once the change has been requested, your named approvers approve or reject the suggested change.
To open the page, use the path(s) in the Security and navigation section above.
To initiate the change approval process, do the following:
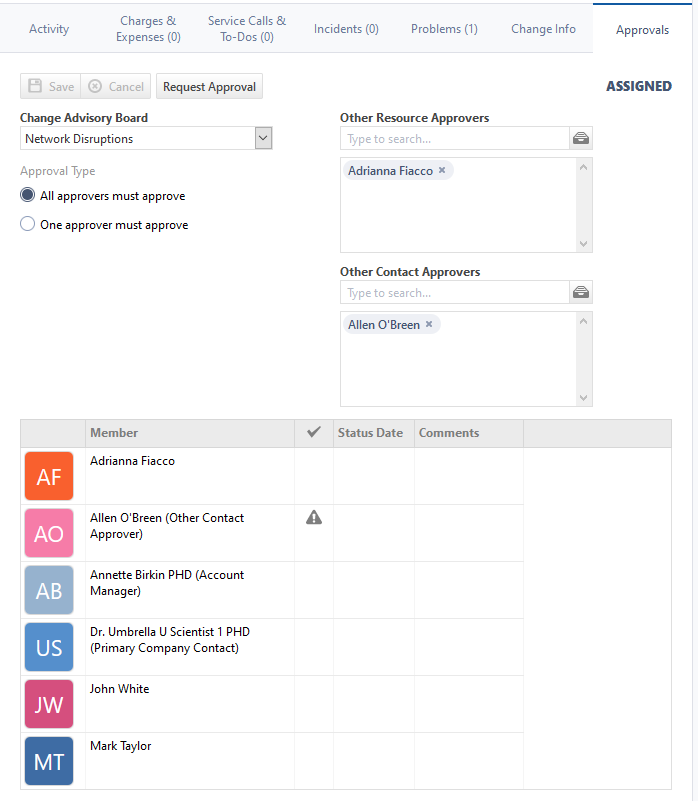
- On the change request ticket, click the Approvals tab. Initially, the approval status is Not Assigned.
- Make a selection in the following fields:
| Field | Description |
|---|---|
|
Change Advisory Board |
If you have pre-configured groups of experts whose approval is required for certain types of change requests, click the dropdown control and select a Change Advisory Board. All global change advisory boards will be available, plus any that are specific to this organization. Refer to Managing change advisory boards. |
|
Other Resource Approvers |
Instead of, or in addition to, a change advisory board, you can request approval from any resource in your Autotask instance. Click the selector icon |
|
Other Contact Approvers |
Client contacts can also be asked to approve a change. Click the selector icon
|
- After selecting an advisory board, resources or organization contacts, click Save. All approvers are added to the approver list, and the approval status changes to Assigned.

- Select an Approval Type.
| Field | Description |
|---|---|
| Approval Type | By default, all selected approvers must give their approval for the change to be approved. If you select the One approver must approve radio button, the change is approved as soon as the first approver gives their approval. |
| Request Approval | Your selections are automatically saved, but the ticket will not appear on the approvers' My > Service Desk > My Workspace > My Change Approvals tab until you click Request Approval. |
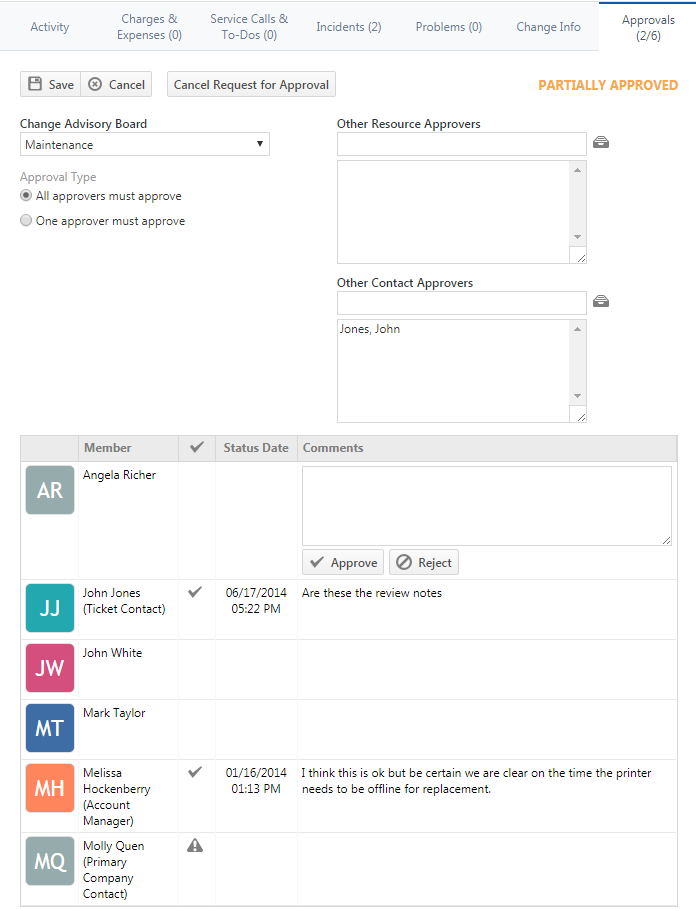
- After you clicked Request Approval, the tab will be refreshed, and the approval status is updated to Requested and the button changes to Cancel Request for Approval. The assigned change approvers will be notified as per your notification settings.
- If you made a mistake with the selection of approvers or the change is abandoned, click Cancel Request for Approval. The approval status changes back to Assigned.
If you are a user who was asked to approve or reject a change request, do the following:
- Go to My > Service Desk > My Workspace > My Change Approvals tab
or
My> Waiting My Approval > Change Requests. - Click a ticket number to open the Ticket page.
- Click the Approvals tab.
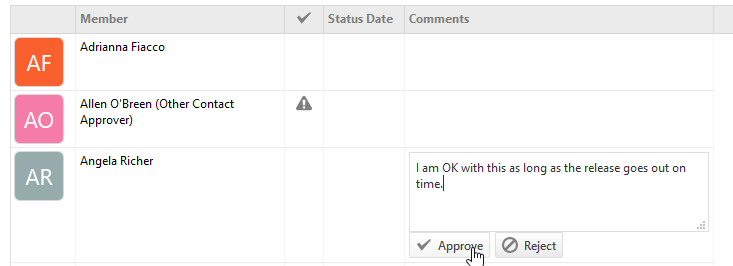
- Find your name on the approver list and add (optional) comments.

- Click Approve or Reject . Your changes will be saved automatically and the change approval status will be updated to either Partially Approved (if all approvers must approve), or Approved (if only one approver must approve).
End user contacts approve the change request in the client portal. Refer to About change requests, incidents and problems.
- Go to My > Service Desk > My Workspace > My Change Approvals tab
or
My> Waiting My Approval > Change Requests. - Click a ticket number to open the Ticket page.
- Click the Approvals tab.
- Find your name and add (optional) comments.
- Click Update Approval or Update Rejection . You can also approve a change you previously rejected or reject a change you previously approved. Your updates will be saved automatically and the change approval status will be updated.
Below the Approver selection boxes, a table displays the progress of the approval process.
The table displays the approval status, status date, and any comments added by the approvers. If you are an approver, you can enter comments and click Approve or Reject.
A warning icon ![]() is displayed if an approver is a customer contact who does not have access to the Client Portal or the ticket belongs to a queue that is not visible in the Client Portal, or both.
is displayed if an approver is a customer contact who does not have access to the Client Portal or the ticket belongs to a queue that is not visible in the Client Portal, or both.


