Managing contact group membership
PERMISSIONS Security level with access to CRM and feature access to Contact Group Manager
NAVIGATION Left Navigation Menu > CRM > Notify Your Contacts > Contact Groups > right-click > View Contact Group
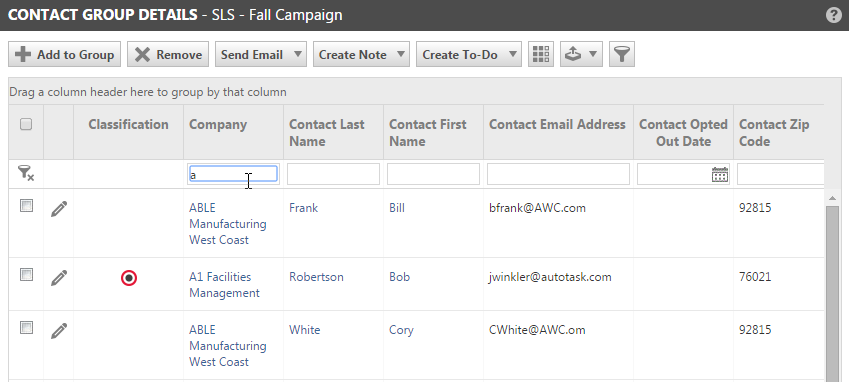
The Contact Group Details page displays a list of all active contacts currently in the group. From this page you can initiate contact actions, remove contacts from the group, export a list of the contacts in the group, and open the Add Contacts to Group page.
Task buttons
| Name | Description |
|---|---|
| Add to Group | Launches the Add Contacts to Group window. Refer to Adding members to a contact group. |
| Remove | Click to remove selected contact(s). Refer to Removing contacts from a group. |
| Send Email | From the Contact Group Detail, you can select a contact action to execute, that is, send emails, create notes, or create to-dos. When you select a contact action, the Contact Action page opens to execute the selected actions for the entire group of for selected contacts. For details refer to Creating and executing contact actions. |
| Create Note | |
| Create To-Do | |
| Column Chooser | Click to select, deselect and order the fields and User-Defined Fields to display in the table. |
| Export | Click to export the list of group members to CSV, XLS or PDF format. All selected columns and the first 5,000 records will be exported. You can export the list as an Excel, Comma Separated Value (CSV), or PDF format file. All columns that appear in the table are exported. The exported list will maintain the ordering that appears in the table. TIP To export a partial group list, you can create a new group, add the desired contacts to that group, and export. |
| Advanced Filter | The Advanced Filter allows you to build queries on multiple columns using a variety of operators. All columns available for the page table are available for advanced searches. Refer to Using the advanced filter. |
Setting up the Group Member table
The table that displays the contact group members has advanced features that allow you to control both the columns and the rows that are displayed, and how they are grouped and filtered.
You can add and remove columns as needed, with the exception of three stationary columns: Last Name, First Name, and Email Address.
You add and remove columns using the Column Chooser.
You can click and drag most column headings in the table to move the column to another place. Some columns may be stationary, that is, you cannot move them. You can move other columns to either side of the stationary columns if needed.
- Place the cursor over a column heading.
- Click and drag the column heading to the desired place.
- Use the small arrows that appear above and below the heading to position it in the row.
NOTE If you don't see the small arrows, the heading that you are dragging is not positioned correctly in the Heading row.
You can filter this table using simple column filters that appear as empty fields below the column headings.
You can search on only one column at a time. You can enter data into another column, without clearing the filters, to search the original result. If you clear the filter, the original search results are lost.
TIP To search on multiple columns at once, use the Advanced Filter.
- To use the column filter, enter characters into the filter field. If the field contains a menu, select the option you want to search on. When you stop typing or click your selection, the search is executed.
TIP If you do not see the column you want to filter on, click Add/Remove Columns and drag the needed column from the Field Selector into the table.
What data is returned?
The column filters compare the character string in the search field to the initial characters in the data stored in that column. If the column filter contains a menu, the search will return only an exact match.
The search will not return items where the specified character string appears in the middle or at the end of the data in the field, unless you use a wild card.
Using a wild card
The column filters accept the percent sign (%) as a wild card. This allows you to perform a modified contains search. If you know a string of characters contained in your search target, you can use the % as the initial characters in your search string, directly before the characters you want to search for.
Searching on multiple columns
You cannot use the column filters to search on multiple columns at once. You must enter characters into one column filter at a time and allow that search to execute before you can enter data into another column filter.
The table will retain data in the column filters until you clear the filter fields, allowing you to build your search step by step. If you need to filter on multiple columns, we recommend that you use the Advanced Filter. Refer to Using the Advanced Filter, below.
Clearing the column filters
The table will retain all characters entered into the column filters and continue to filter by that criteria until you clear the filter field.
- To clear all column filters, click the Clear icon option to the left of the filters.
NOTE The Clear option appears only when one or more column filters contain data.
As with most Autotask tables, you can click any column heading to sort by that column. Items will sort in ascending order. Click again to reverse the sort order.
You cannot group by the three stationary columns: Last Name, First Name, and Email Address.
The table allows you to group the listed items by any column that is not stationary. If you can move the column, you can group by it.
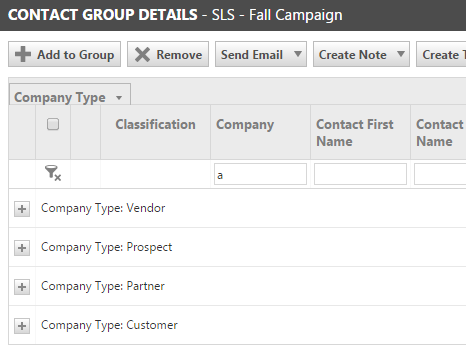
To group by column heading, drag the heading into the row above the column headings. You can group by multiple levels.
- Locate the heading of the column you want to group by.
- Click and drag the heading into the row above the column headings.
The column label moves to the left side of the row above the column headings. The table re-sorts into groups of contacts that share the same value in the group by column; for example, if you group by a column for the Organization Type field, all contacts that share the same organization type will be grouped.
A heading label identifies the column you are grouping by and the value shared by the contacts in the group.
- In the table, click a + sign to expand a heading row and view the list of contacts that share the same group by column value.
- To group at multiple levels, drag additional column labels into the row above the column headings.
The highest level of grouping will be the column to the left. Levels will decrease to the right.
TIP You cannot change the position of the headings in the Group By row. To make a newly added column the highest "group by" level, you must move it to the far left when you move it to the Group By row. To change the position of a heading already in the row, you must first drag it back into the heading row and then drag it back into the desired position in the Group By row.
To remove the grouping, drag the columns back to the column heading row.
To set the number of records that display on a page, select the number from the "Records per page" list.
Navigation tools to move through the list, along with additional information about the number of items in the list, appear below the table. You can see how many records are in the current list, how many pages of records there are, and how many items are selected from all pages.
If you one or more items have been selected, the number of selected items appears below the navigation arrows. This is the total number of items selected on all pages.
- Click the link to switch between Show Only Selected Contacts and Show All Items.
Removing contacts from a group
To remove contacts, do the following:
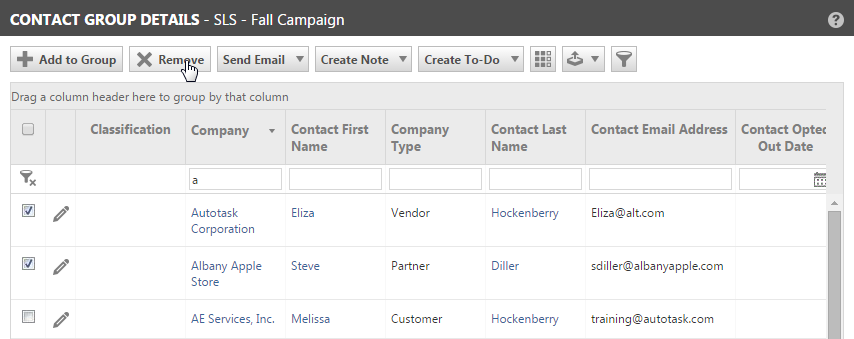
- Use the column filters or Advanced Filter to locate the contacts you want to remove. Refer to Using the advanced filter.
- Click the check box for each contact that you want to remove, or if you want to remove all the contacts displayed on the page, click the check box in the header row.
NOTE If you apply additional filters to the list after you select check boxes, your selections are lost. If you cannot configure a search that allows you to select all the contacts that you need to remove at once, select contact from one search, remove those contacts, then repeat using different filtering criteria.
- If you list paginates, continue selecting contacts on each page.
When you click the check box in the heading row, it selects all check boxes on the current page only. When you move from one page to another, all selections are maintained.
- When you have selected all contacts that you want to remove from the current list , click Remove Contacts.
TIP Double check the selected contacts. Once you click Remove Contacts, the removal cannot be reversed.
A message opens indicating how many contacts you have removed from the group.
- Click OK to acknowledge the message. Repeat this process as needed.
Managing contact group membership from other locations
Many group member management features are also available from the Organization page > Contact Groups tab and the Contact page > Contact Groups tab. For details on managing group contacts from the Organization or Contact pages, refer to The Contact Groups tab.


