The Documentation Manager
PERMISSIONS Security level with access to the organization and object permission to view, add, or edit documents
NAVIGATION Left Navigation Menu > CRM > Search > Organizations > open an organization > Organization page and Organization Dashboard pages > click Documentation Manager
NAVIGATION Left Navigation Menu > Home > View > Documentation Manager
NOTE The Documentation Management functionality is included in the Autotask Premium edition and the Ultimate edition. For customers with the Essential edition, the Document Management module is disabled.
BEFORE YOU BEGIN For an introduction to Document Management, refer to Introduction to Knowledge Base and Documentation Management.
To open the page, use the path(s) in the Security and navigation section above.
About the Documentation Manager page
On the Documentation Manager page, you can do the following:
- Create and view the organization Overview page (if an organization is selected). Refer to Create an Overview document for an organization.
- Create, view, and manage documents. Refer to Create and manage documents.
- Open the Manage Documentation page (users with the required permissions)
- Access devices, grouped by device categories. Refer to Manage devices.
- View all devices that have a warranty expiration date, valid to date (SSL certificates), or expiration (domains). Refer to Manage expiration dates.
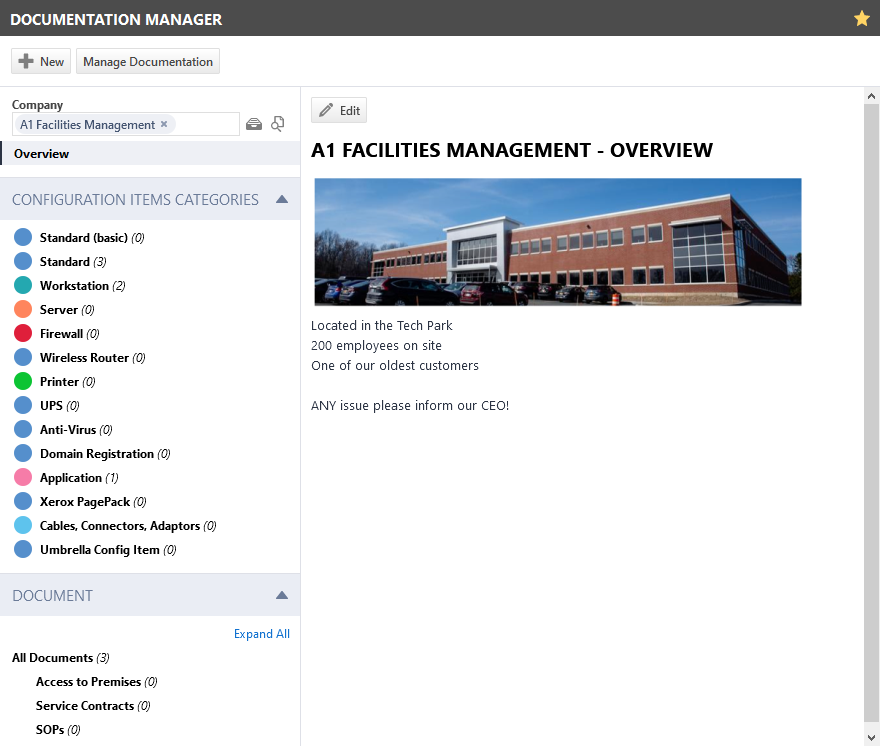
The page consists of a sidebar on the left and a main content area. Items you click on the sidebar appear on the main content area.
How to...
When the page is first opened and an organization is selected, the organization Overview document appears in the main content area. This document is intended to provide a quick introduction to the organization and a thumbnail sketch of your business relationship.
To add an organization overview document, do the following:
- Click Edit. The Edit Overview dialog box appears.
- Enter the organization thumbnail into the Overview Content field. The overview is created and edited using the Rich Text editor, and can contain inline images. Refer to The Rich Text editor.
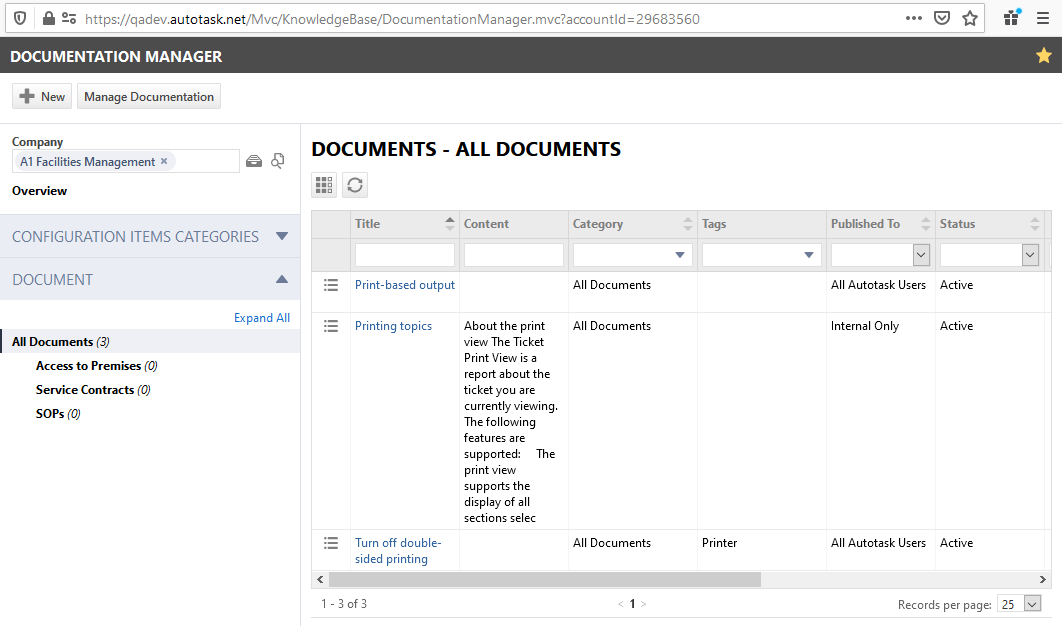
On the Documentation Manager page, you can create new documents and manage all documents in your Autotask instance.
- To create a new document, click New. Refer to Adding and editing documents.
- To manage the documents in the Documents table, use the context menu. Refer to The Documents table and accessory tab.
- To manage document categories and sub-categories, click Manage Documentation. Refer to Documentation Management administration.
- To search all documents in your Autotask instance, clear the Organization filter in the sidebar and, in the Documents section, select All Documents. To locate specific documents, click on a sub-category, or use the column quick filters.
- To search for documents associated with a specific organization, select an organization in the Organization filter at the top of the sidebar.
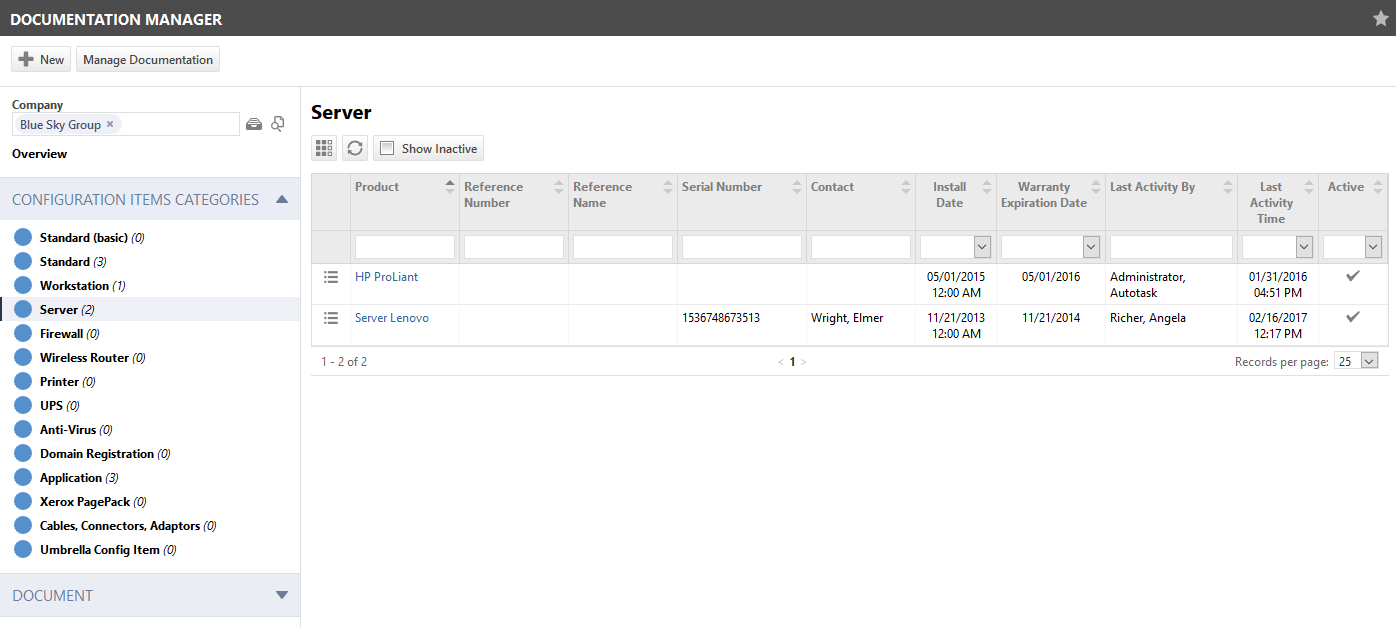
The Devices section on the sidebar lists all Devices Categories configured in your Autotask instance and, in parentheses after each category, the number of devices associated with the organization. When you click a category, a device table appears that contains all devices in the category. You can search for a specific item using the column quick filters.
Clicking on a device will open the Device page. Refer to The Device page.
The context menu is identical to the one on the Device Search page. Refer to Searching and managing devices.
On the Expirations table of the Documentation Manager page, you can view all devices that have some sort of expiration date, including the following:
- Warranty Expiration dates for regular devices
- Valid Until dates for SSL certificates
- Expiration dates for domains
A limited number of fields are available from the Column Chooser, but context menu options match those on the Device Search page. Refer to Searching and managing devices.
Items that expire the soonest will appear at the top.
If you selected an organization on the sidebar, only expiring devices for that organization will appear. If no organization is selected, all devices with an expiration date are displayed.
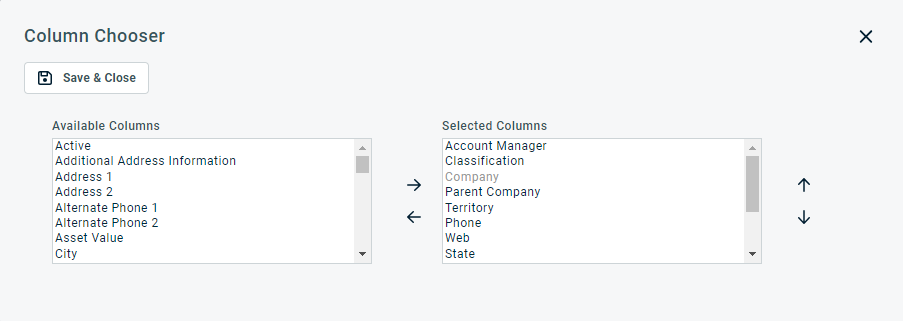
The Column Chooser allows you to customize search results tables throughout Autotask. It determines the following:
- Which columns are displayed on the table
- The left-to-right display order of the columns
NOTE Column Chooser settings on search results tables and some standard reports are part of the user settings stored on the Autotask server. You can log in from any computer and have your column chooser settings applied to your Autotask session. To clear the data stored in your Autotask instance and reset the column chooser settings to the Autotask default settings, click Reset Settings in My > Miscellaneous > Settings.
To customize the table, do the following:
- Click the column chooser icon
 above the search results. The Column Chooser page opens.
Columns appear either in the Available Columns or the Selected Columns panel.
- Double-click a column name or select one or multiple columns and click the left or right arrow to move columns to the other panel.
- To change the display order of the columns, select one or multiple columns in the Selected Columns panel and click the up or down arrows.
NOTE Top-to-bottom order in the Selected Columns list becomes left-to-right order on the Search Results list.
- Click Save & Close.
TIP If the characters + # appear after the column name, then that column may have multiple items returned for some rows. If that occurs, the first item will appear in the row followed by + and the number of additional items returned. To display the list of additional items, hover over the item in the column.
Click the refresh icon ![]() to execute the search on the current table again, using the same search criteria to find new records that were added since you first performed the search.
to execute the search on the current table again, using the same search criteria to find new records that were added since you first performed the search.
PERMISSIONS By default, Export is available to users with Admin security level and disabled for all others. It can be enabled for other security levels. Refer to Can export Grid Data.
NOTE When exporting to CSV: To ensure consistent date/time formatting in the CSV output, we strongly recommend that the user’s date/time format settings in Autotask be identical to the Windows date/time format settings of the computer performing the export. This will prevent conflicts in how the software that generates the report interprets the date/time format.
- Click the Export as CSV icon.
- A window opens that allows you to download and open the exported file.
NOTE Note that only the selected columns of the first 5,000 records will be exported.
IMPORTANT The export file does not contain all fields that are required to re-import the data using the data import templates, and the data headers do not match.


