Assigning tickets to resources
PERMISSIONS Users with Add or Edit Ticket permissions. Users who cannot edit tickets can still assign the ticket to a resource using Forward/Modify.
NAVIGATION Multiple
After a ticket is entered into Autotask, it can be assigned to one or more resources to work on. It can be assigned to resources, to a queue, or to both.
About queues
If you want to place the ticket in a list where multiple people can access and work on it, you can use a queue. A ticket can only be in one queue at a time.
A service desk manager can find unassigned tickets in a queue (using the Service Manager custom dashboard tab) and assign the appropriate resources to work on them. Resources can see all queues assigned to them, and the tickets in those queues, from widgets on the Service Technicians dashboard tab, and in lists on the My Workspace & Queues page: My > Service Desk > Workspace & Queues.
How to...
Whether technicians find and self-assign tickets or a manager does that for them, you will have to know how to locate and assign tickets. You can locate or assign tickets from dashboard widgets and queues, the My Workspace & Queues page, or Ticket Search:
Find and assign/claim a ticket using dashboard tabs and queues
- Go to Dashboards > My Work or, if you have access, to Dashboards > Service Technician or Dashboards > Service Manager
- Locate the widget illustrating the tickets you want to claim (for example, on the Service Technician dashboards, Unassigned Open Tickets by Queue)
- Click any portion of a widget to open that ticket list.
TIP To claim an unassigned ticket for yourself, right-click and select Accept Ticket. If the ticket is already assigned, go to Step 4, below.
- Right-click the ticket in the list and select Edit Ticket.
- In the Assignment area, select the primary and secondary resources for the ticket. If you are claiming the ticket for yourself, select your name as the primary resource.
Find and assign/claim a ticket using the My Workspace & Queues page
- Go to My > Service Desk > My Workspace & Queues or Left Navigation Menu > Service Desk > View > My Workspace & Queues.
- In the left pane, click the queue that contains the tickets you want to claim. If you are looking for a ticket that has no primary resource assigned, select a queue from the Not Assigned list.
A list of all tickets in the selected queue opens to the right.
- In the right pane, locate the ticket you want to claim.
- To claim an unassigned ticket for yourself, right-click and select Accept Ticket. You are now the primary resource.
- If the ticket is already assigned, right-click the ticket in the list and select Edit Ticket.
- In the Assignment area, select the primary and secondary resources for the ticket. If you are claiming the ticket for yourself, select your name as the primary resource.
Refer to The My Workspace & Queues page.
Find and assign/claim a ticket using the Service Desk ticket search
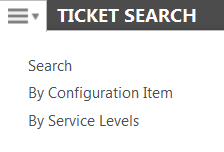
- Go to Left Navigation Menu > Service Desk > Search > Tickets
| Search Type | Use |
|---|---|
| Search | The basic Search page will be displayed by default. It offers a wide variety of search fields (including UDFs), and will meet the majority of your ticket search needs. |
| By Device | This is a great way to search tickets by product name, product serial number, product reference number, or product reference name. |
| By Service Levels | This search allows you to search for tickets based on dates and time, in order to ensure tickets are falling within the time frames established in service level agreements. |
- Enter your search criteria.
NOTE If multiple fields are used for search criteria, all entered criteria must be met in order for a ticket to appear in the results page.
- Click Search or press Enter.
Search results for all ticket searches are displayed in a tickets table on the bottom half of the page. For more information on Autotask search features, refer to Searching and managing tickets.
TIP To claim an unassigned ticket for yourself, right-click and select Accept Ticket. If the ticket is already assigned, continue to Step 5, below.
- Right-click the ticket in the list and select Edit Ticket.
- In the Assignment area, select the primary and secondary resources for the ticket.
- Click Save & Close.
NOTE You cannot accept a ticket that already has a primary resource assigned.
You can easily accept a ticket using the following shortcuts:
- Right-click a ticket in any ticket list or from any ticket search and select Accept Ticket
- On the Ticket page, click Accept in the toolbar.
TIP If somebody accepts a ticket and, before the list or ticket detail can refresh, you accept the same ticket, a message opens to let you know the ticket already has a primary resource.
When you accept a ticket from a ticket table or the Ticket page, you do not make an explicit role selection. The ticket is assigned to you using your default service desk role. If you do not have a service desk role, the ticket is assigned using the first role assigned to you in alphabetic order.


