Receiving or canceling receipt of purchase order items
PERMISSIONS Users with Inventory object permissions to add / edit purchase orders
NAVIGATION Left Navigation Menu > Inventory > Procurement & Delivery > Purchase Orders > context menu > Receive/Cancel Receipt of Purchase Order
NOTE If Procurement is activated for your Autotask site, you can also receive items on the Receiving page. Refer to The Receiving page (Procurement required).
About the Receive/Cancel Receipt of Purchase Order page
On the Receive/Cancel Receipt of Purchase Order page, you receive, or cancel the receipt of, purchase order items associated with a specific purchase order. The received items are either added to your inventory as stocked items, or directly received to the customer location.
- Receiving adds information like the Vendor Invoice #, Freight, or Serial Numbers to the purchase order.
- Canceling the receipt of items allows you to correct mistakes made during the receiving process, and reduce the quantity ordered if the vendor is not able to fulfill the entire order.
To receive a purchase order, its status must be Submitted or Received Partial. To cancel the receipt of purchase order items, the status can be Submitted, Received Partial or Received Full.
Each time you open and then save the Receive/Cancel Receipt of Purchase Order page, a transaction record is generated that records the status and number of items received, even if there has been no change to these fields. You can retrieve these records from the Purchase Order History page.
To receive items on a purchase order, do the following:
- To open the page, use the path(s) in the Security and navigation section above.
- The Receive/Cancel Receipt of Purchase Order page will open. The Receive Purchase Order Items table sorts items by Product Name, and within the product name by Inventory Location.
IMPORTANT This page will have different features, depending on whether you have Procurement activated.
If you have Procurement activated: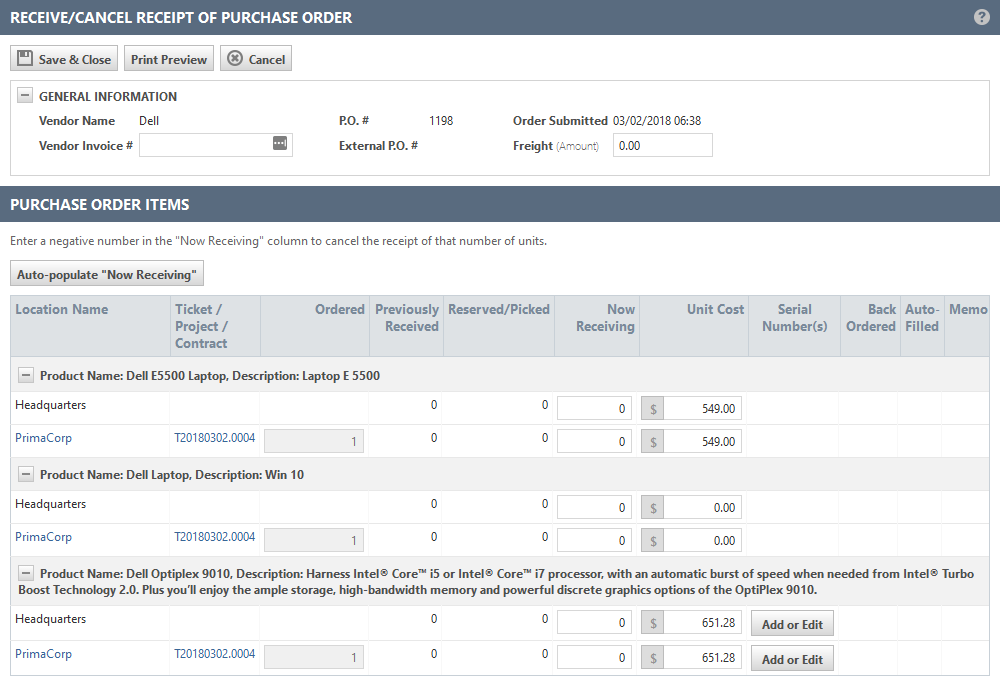
If you don't have Procurement activated: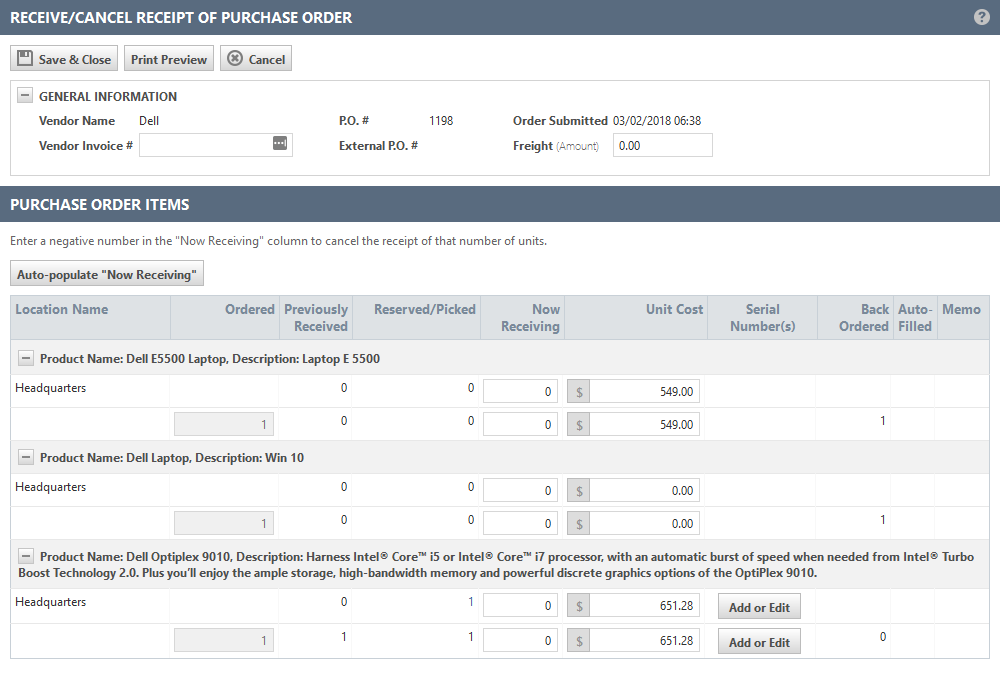
- Complete the following fields or actions:
| Field Name | Description |
|---|---|
|
General Information |
|
|
Vendor Invoice # |
The Vendor Invoice Number is associated with purchase order items when they are received into Autotask as stocked items. The same vendor invoice number is assigned to all purchase order items that are received in the same shipment. If a purchase order item is partially received over multiple shipments, it may have multiple associated vendor invoice numbers. On the purchase order, the Vendor Invoice # field becomes read-only when the first item on the purchase order has been received. It will contain all vendor invoice numbers associated with all purchase order items that are part of the purchase order, separated by commas. This field is required if the Require Vendor Invoice Number on received purchase order items and when manually adding stocked items to inventory system setting is enabled. Enter the Vendor Invoice Number associated with the purchase order items you are receiving. |
|
Freight |
Enter or adjust the shipping charges for this shipment, according to the vendor invoice. |
|
Purchase Order Items |
|
If the purchase order item was ordered for a specific customer as a (contract, project, or ticket) charge, you will see two rows for each product name, the default inventory location for the inventory product, and row that displays a link to the customer organization or the sales order and customer organization, and the parent item of the charge.  Depending on your company's workflow, you can receive the items at your local organization's internal location, or receive them directly to the customer location. If you do not have Procurement activated, the two rows are displayed, but the links are not shown. |
|
|
Auto-populate "Now Receiving" |
Click the Auto-populate "Now Receiving" button above the table to populate the Now Receiving column with the difference between Ordered and Previously Received quantities for all rows. NOTE If you selected items on the Receiving page and then clicked the Receive Full/Partial button to open the Receive/Cancel Receipt of Purchase Order page, the Auto-populate "Now Receiving" button will only populate the Now Receiving column for the items that you selected on the Receiving page. |
|
Now Receiving |
The Now Receiving column displays "0" for all rows. If you cannot auto-populate the Now Receiving column because the shipment is a partial shipment, you must manually update the count in this column. |
|
Unit Cost |
The Unit Cost saved on receipt of the PO is the value used for your company's profitability reports. Compare the unit cost on the vendor invoice with the Unit Cost of the purchase order item, and update it as necessary.
|
|
Add or Edit |
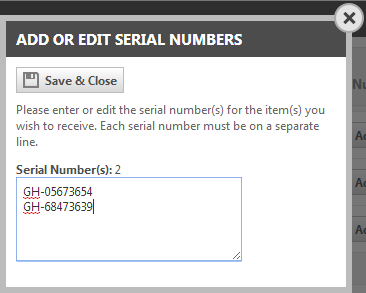
If you are receiving serialized products, click Add or Edit in the Serial Number(s) column for the internal or customer location. This opens the Add or Edit Serial Numbers dialog. Enter a serial number for each item received to this inventory location (each serial number must be on a separate line), and then click Save. NOTE You can use a "keyboard wedge" option with a bar code scanner to quickly enter serial numbers. IMPORTANT The count in the Now Receiving column and the number of serial numbers that you enter must match, or you won't be able to save the page. |
|
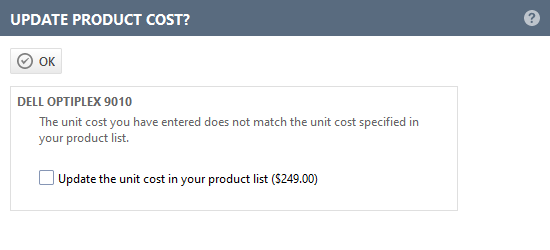
Multi-currency considerations: If Multi-currency is enabled, the Freight and Unit Cost fields will display the currency indicator in the vendor currency. The fields are read-only if the vendor currency and the internal currency are the same. If the vendor currency is different, hovering over the currency indicator will display the amount in the internal currency, as calculated by the exchange rate for the currency pair. The Update Product Cost? dialog will only appear if the vendor currency and the internal currency are the same. |
|
- Click Save & Close.
The status of the purchase order will be updated as follows:
- If the number of items received for an inventory location is less than the number ordered, the number of items not received appears in the Back Ordered column; the purchase order status changes to Received Partial.
- If all items are received, the purchase order status changes to Received Full.
- The received purchase order items will be added to your inventory locations as stocked items. Refer to Adding stocked items.
NOTE If the purchase order item is associated with a ticket charge, the serial number must be un-picked on the ticket charge page before it will appear on this window. Refer to Unpicking a stocked item.
To cancel the receipt of a number of units, do the following:
- To open the page, use the path(s) in the Security and navigation section above.
- Enter a negative number in the Now Receiving column. The number must be less than or equal to the previously received quantity and the available quantity on hand.
- If you are canceling serialized products, click Add or Edit in the Serial Number(s) column. This opens the Edit Serial Numbers dialog.
- Select the serial numbers you are canceling the receipt of. These serial numbers will be deleted.
NOTE If the stocked item it non-serialized, the available units will be decreased by the number canceled.
- Click Save & Close.
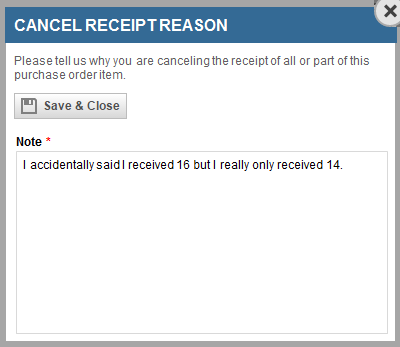
- Depending on a system setting, you may be prompted to enter a reason why you are canceling the receipt of a purchase order item, and the note may be required. Refer to Require/prompt users to enter a reason when manually updating an inventory item’s On Hand quantity, or when canceling receipt of a purchase order item.
The status of the corresponding stocked item is set to Removed.
The status of the purchase order will be updated as follows:
- If the status is Received in Full and there are still received units after the receipt cancellation, the status will be set to Received Partial.
- If the status is Received Partial and there are still received units after the receipt cancellation, the status will remain Received Partial.
- If the status is Received Full and there are no received units after the receipt cancellation, the status will be set to Submitted.

