Adding and managing attachments
PERMISSIONS Access to the entity
PERMISSIONS For attachments to CRM entities, security level with CRM access and appropriate object permissions for Attachments
NAVIGATION Multiple, see below.
About Attachments
Attachments are external files that are linked to one of the following Autotask entities:
- Co-managing User
- CRM Note and To-Do
- Device
- Device Note
- Document
- Expense Report
- Knowledge Base Article
- Note
- Opportunity
- Organization
- Project, Task, Issue
- Project Note
- Resource
- Sales Order
- Ticket, Recurring Ticket
EXAMPLE You can attach a resume to a resource, work instructions to a ticket, a project plan to a project, and scanned receipts to an expense report.
TIP When you add an attachment from most pages, you can also email the attachment to a contact, another Autotask resource, or any email address. You cannot email Resource Management attachments.
There is no limit to the number of attachments you can make to Autotask entities, like organizations or tickets. There are, however, limits to the individual file size and, in the case of attachments to email notifications, limits to the combined total file size of attachments:
| Attachment process | Individual file size limit | Combined total when uploading multiple files at once |
|---|---|---|
| Files uploaded in the Autotask UI Example: project or ticket attachments |
10 MB | no limit |
| Files added to Autotask via the Outlook Extension | 10 MB | no limit |
| Attachments processed by Incoming Email Processing or ATES | 5 MB* | 10 MB* |
| Total size of incoming email, including attachments | 30 MB | n/a |
| Files attached to Email Notifications | 10 MB** | 10 MB** |
* If an incoming email has a single attachment larger than 5 MB limit or multiple attachments with a combined total size greater than 10 MB, the ticket will be created, but the attachments will not be added. The attachments can be retrieved from the original email and manually added to the ticket.
**If a single attachment, or the total size of all attachments, is greater than 10 MB, the files will be attached to the notification in Autotask and the email will be sent, but the attachments will not be included in the email.
Autotask blocks selected file types that have the potential to introduce harmful viruses.
Autotask will not accept the following file formats: ade, adp, app, asp, aspx, bas, bat, bin, cer, chm, class, cmd, cnt, com, cpl, crt, csh, cshtml, der, exe, fon, fxp, gadget, hlp, hpj, hta, inf, ini, ins, isp, its, iw, js, jse, ksh, lnk, mad, maf, mag, mam, maq, mar, mas, mat, mau, mav, maw, mda, mde, mdt, mdw, mdz, msc, msh, msh1, msh1xml, msh2, msh2xml, mshxml, msi, msp, mst, ops, osd, pcd, php, pif, plg, prf, prg, ps1, ps1xml, ps2, ps2xml, psc1, psc2, pst, reg, scf, scr, sct, sh, shb, shs, sys, tgz, tmp, url, vb, vbe, vbp, vbs, vsmacros, vsw, ws, wsc, wsf, wsh, xnk.In addition, video files are not supported.
Adding attachments
- Navigate to the entity you want to attach a file to.
| Entity | Path |
|---|---|
| Contract Note | Contract Note > Attachments tab > Add Attachment |
| CRM Note or To-Do | CRM Note or To-Do > Add New Attachments > Add Attachment |
| Device |
Device page > Attachments tab > New Device page > Activity tab > New Attachment Device page > Activity tab > New Note > Add Attachment |
|
Document Management |
New Document and Edit Document pages > Add Attachment |
| Expense Report | Expense Report > New Attachment |
|
Knowledge Base |
New Article and Edit Article pages > Add Attachment |
| Opportunity |
Opportunity page > Activity tab or Quick Add bar > New Attachment Opportunity page > Attachments tab > New |
| Organization |
Organization page > Attachments accessory tab > New Organization page > Activity tab > New Attachment |
| Project | Projects Menu > Attachments > New |
| Project Note | Project Note > Attachments tab > Add Attachment |
| Resource | Left Navigation Menu > Admin > Admin Categories > Organization Settings & Users > Resources/Users (HR) > Resources/Users (HR) > Resources/Users > context menu > Edit Resource > Attachments tab > Add Attachment |
| Sales Order | Sales Order > New > Attachment |
| Task or Issue | Projects Menu > Schedule > Task or Issue context menu > New > Attachment or Task > Activity tab or Quick Add bar > New Attachment |
| Ticket |
Ticket page > Attachments tab > New Ticket page > Activity tab or Quick Add bar > New Attachment |
| Ticket Note | Ticket Note > Add Attachment |
| Time Entry | Time Entry > Add Attachment |
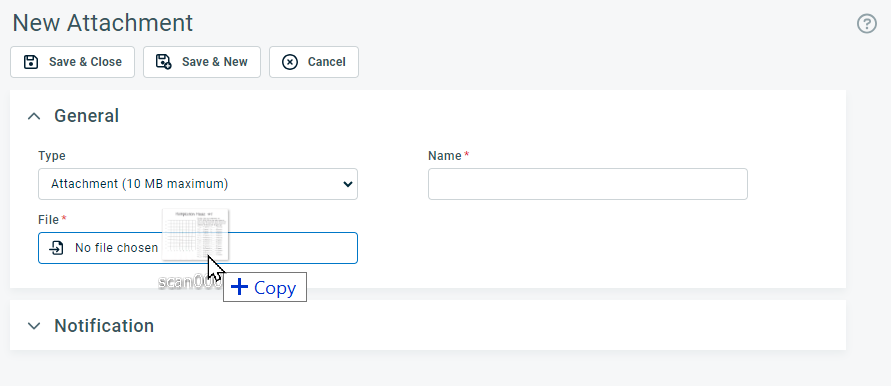
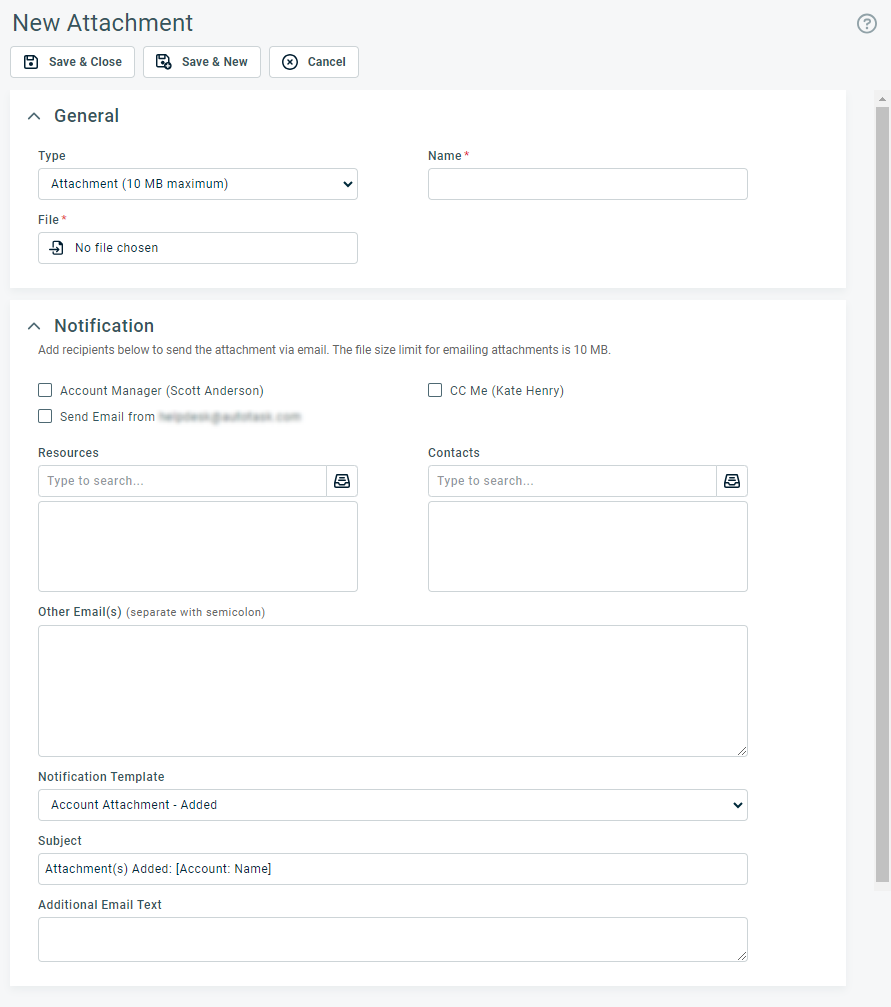
The New Attachment window opens.
NOTE The appearance of the New Attachment page may vary slightly from the image shown, depending on the entity type and where you access the page.
- Populate the following fields:
| Field | Description |
|---|---|
| General | |
| Add attachment to this ticket and its # incident(s) (Problem tickets only) |
Select the check box to add the attachment to both the problem ticket and any associated incidents. This check box only appears when adding a note to a problem ticket that has at least one incident. For more information on problem/incident tickets, refer to Working with problem and incident tickets. |
| Type | Select how the file will be linked to the entity. Options include the following: |
| Attachment: The file is uploaded to the Autotask server. Recommended if you want the file to be available to all users with access to the entity. | |
| File Link or Folder Link: Saves the path to the file on your PC or network drive. Recommended if all users have access to the file location through a VPN. |
|
|
URL: Saves the URL of a Web page, or a document on an FTP site. You must copy the complete URL and paste it into the field. NOTE URL attachments appear in Autotask as hyperlinks directly to the content. Since external Web locations can be a security threat, when a user clicks the link, a message opens to advise that the user is about to leave the Autotask domain. The user can choose to continue or not. |
|
| File* (required) |
|
| Name | Defaults to the file name but can be edited. You can attach multiple files with the same name. |
| Publish to |
The Publish type determines who can view notes or open attachments created by a resource (system notes visibility is determined by the viewer's security level). It is either inherited from the note type (but can be edited), or selected outright from the Publish To dropdown menu. The following options are available:
Attachments without a Publish To selector inherit the visibility of the parent entity. EXAMPLE When you add an attachment while editing a ticket note, the ticket note's Publish To option is applied to the attachment. |
| Notification | |
| Notification |
Click to expand the notification form to email the attachment. Refer to Generating a manual notification If the Notification section is located on the File Attachment page, you can attach the attachments to the notification email message. Refer to Sending attachments with a notification email. |
- Click Save & Close or Save and New to upload the attachment.
An indicator bar tracks the progress of the upload.
NOTE When uploading files to the server, Autotask checks the file size and type. If the file type is not acceptable or the file size is over 10 MB, an error message appears.
If you need to cancel the upload, click Cancel.
Sending attachments with a notification email
When you add attachments to an Autotask entity, you can use notification emails to send those attachments to a contact, co-worker, or another email address.
NOTE Notification emails can only include attachments to the parent entity, not random external attchments.
IMPORTANT The size limit for attachments on emails is 10 MB. When emailing multiple attachments (ticket note, task note, and project note attachments only), the total of all attachments cannot exceed the 10 MB maximum. If you exceed 10 MB, the attachments are added to Autotask but not added to the email.
For most attachments, a Notification section appears in the File Attachment window, below the add attachment fields.
NOTE For attachments added to most entities, if you are uploading more than one attachment (Save & New), each attachment is sent in a separate email. You must complete the Notification form before you click Save & New for the first attachment and again for each additional attachment.
- Before you save and close the New Attachment page, click + to expand the Notification section.
- Complete the Notification fields.
TIP The Notification Template field menu includes an Attachment Added template. In addition, the notification template forms for custom templates include Attachment Added events for each entity that includes the attachment email feature. The template forms also include a set of Attachment variables. For more on notification templates, refer to Adding or editing notification templates.
- Click Save & Close or Save & New. Your attachment is added to Autotask and emailed to the specified recipients.
Ticket notes, task notes, and project notes allow multiple attachments. The total for all attachments on one email cannot exceed 10 MB.
TIP When you add multiple attachments to the same email, to include the name or file path for each attachment in the email text, the notification template must use the Attachment(s) Summary: variable.
To add and email attachments for Ticket Notes, Task Notes, or Project Notes, do the following:
- Open the Add New Attachments section on the New Note or Edit Note page to open the File Attachment window.
- Upload one or more attachments.
- Open the Notification panel. In the Attachments field, select Include Attachments in Email.
- Complete additional notification fields as needed and Save & Close the note. For more information, refer to Notification panel.
When you add an attachment to a ticket note, task note, or project note, you can choose to include the attachment on the notification tab. The setting will be respected for internal and external users.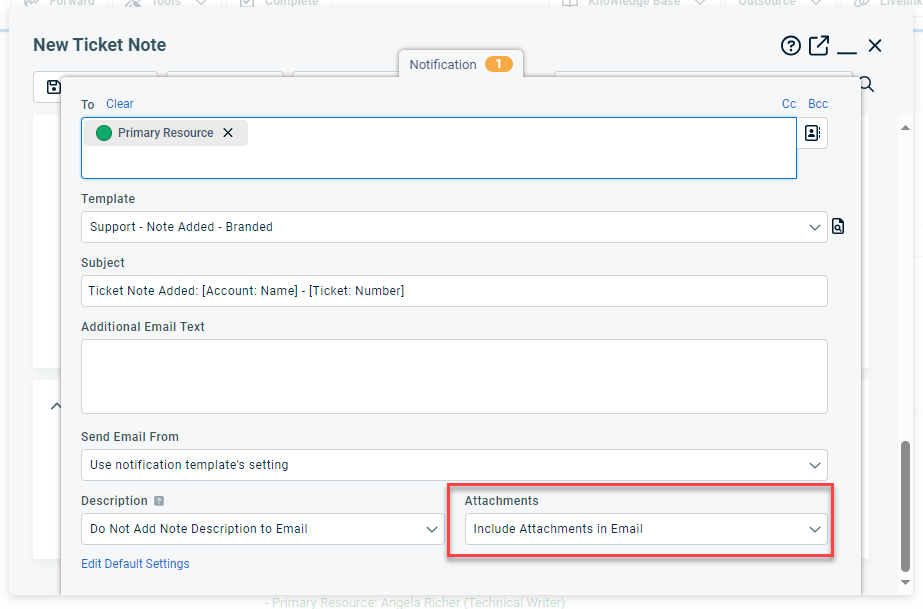
When you add an attachment to other entities, the Publish To setting will be respected. If the Publish To option is set to Internal Users, the notification email is sent to all recipients, but external users will not receive the attachments.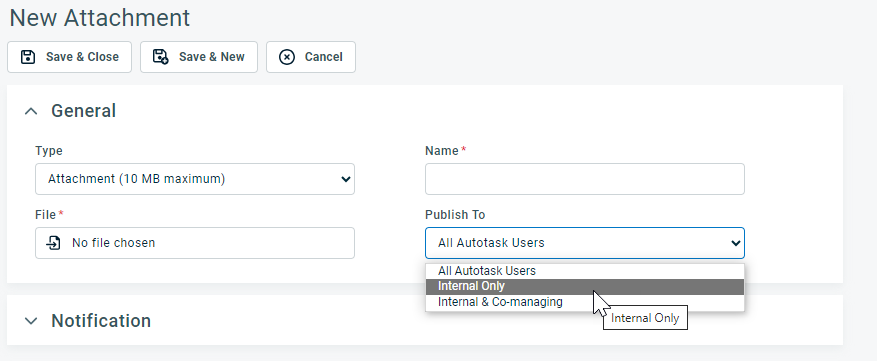
Managing Attachments
Attachments are accessed from and managed on the entity they are attached to. They can be located in an Attachments section, or on an Attachments or Activity accessory tab. Except on the Activity tab, all attachments to an item will be listed in a table. Context menu options will depend on the type of attachments.
Multiple attachments can be deleted at once by selecting the attachments and choosing Delete Selected Attachments from the bulk menu.
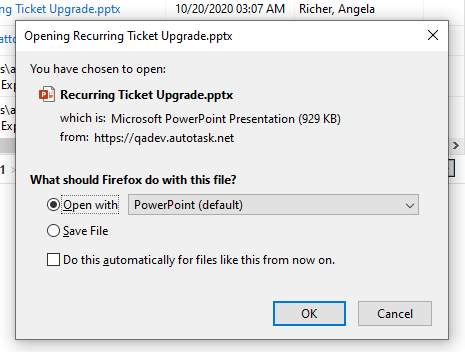
Select the context menu on an attachment to complete one of the following actions:
