Managing dashboard widgets
PERMISSIONS Permission to add and edit dashboard widgets. All Autotask default security levels are configured to permit adding and editing of dashboard widgets, but this setting may have been edited. Check with your Administrator.
NAVIGATION Click Dashboards in the top menu.
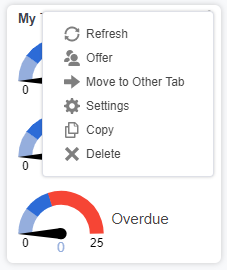
If you have permission to add and edit dashboard widgets, you have pretty much complete control over widgets on personal tabs. Most widget management functions are accessed from the Widget menu, which appears when you hover over the three dots in the top right corner of the widget.
On shared tabs, you can only refresh the widget, that is, re-sample the data underlying the widget.
TIP Shared dashboard tabs are denoted by a ![]() .
.
Best practices
- Other than the entity type, you can edit most widget settings, and it's quicker to edit a widget than to build one. So, before you start to build a new widget, check your existing widgets and the widget library.
- Think about what types of data you need from the entity type. Do you want to report on open tickets or closed tickets? Opportunities with one time revenue or monthly revenue? If you have a clear idea of what you need, it will be easier to complete the widget settings.
- Decide what type of display will be easiest to read. You may like the way a certain visualization type looks, but it may not be the best choice for the data you want to present. For example, a needle gauge is eye catching, but if you want to monitor how your closed opportunities have been trending this year, a simple line chart is the better choice.
- Use the widget filters to focus your data for the best effect. Multiple widgets with specific information will give you more insight than one or two general widgets.
NOTE Each tab can have no more than 24 widgets. If you reach the maximum number of widgets allowed, you can delete an existing widget or start a new tab.
Managing widgets
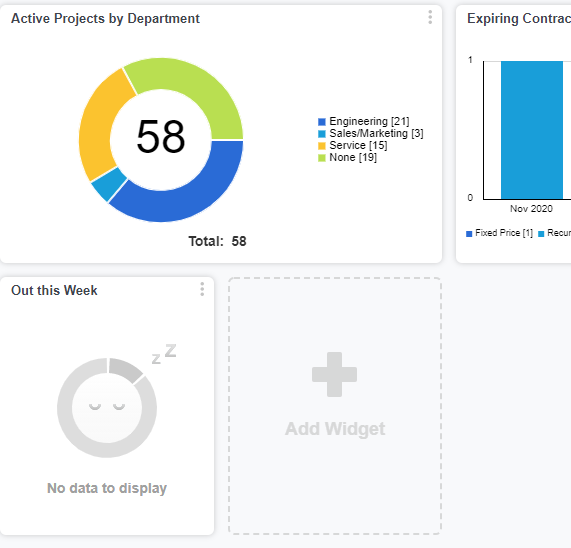
On a dashboard tab, click Add Widget button. The button is grayed out if you have reached the limit of 24 widgets on the tab.
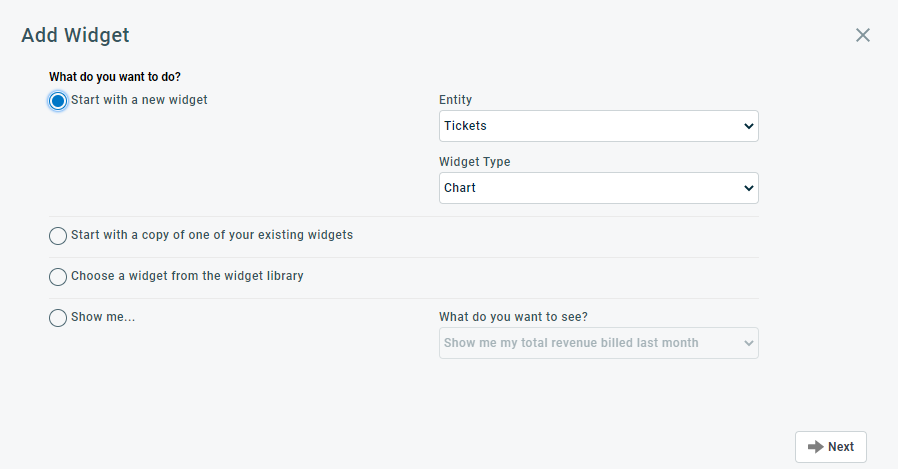
Click the plus sign to open the Add Widget dialog box.
- In the Add Widget dialog box, select Start with a new widget.
- Select the Entity you want to work with and then select the Widget Type. For HTML widgets, select [Miscellaneous] for the entity. For information on entities and widget types, refer to About dashboard widgets.
- Complete the widget settings. For a full description of settings, refer to Adding a new widget.
- Select Choose a widget from the library, then click Next.
- Select the Entity you want to work with and then select a widget from the list of library widgets available for the selected entity.
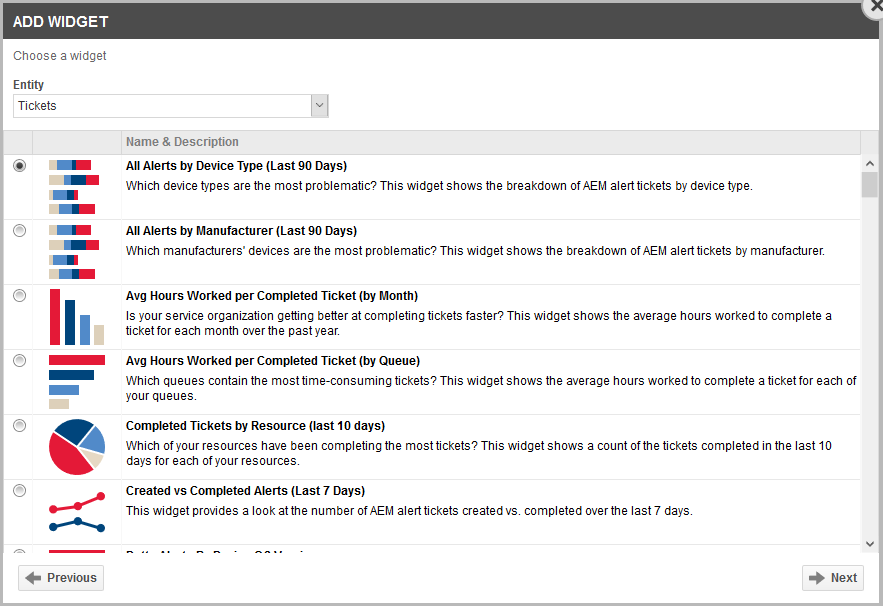
NOTE The widget library does not contain any HTML widgets.
- Click Next.
The Widget Settings page opens for the selected widget.
- If needed, edit the widget settings. For a full description of settings, refer to Adding a new widget.
For more information on the widget library, refer to The dashboard widgets library.
- Select Start with a copy of one of your existing widgets and click Next.
- Select the Entity and then, from the menu of widgets, select the widget to copy. To copy an HTML widget, select [Miscellaneous]. The menu displays only widgets associated with the entity you selected. If you cannot find the widget you want in the menu, try a different entity.
NOTE You can only copy widgets from your own or a default dashboard tab. You cannot copy from a shared tab.
- Click Next. The Widget Settings page opens.
- Complete the widget settings. For a full description of settings, refer to Adding a new widget.
If one or more integration vendor widgets are available, you will see an option to Choose an integration vendor widget from the widget library. Refer to Integration Center for more information on integration vendor widgets.
- Select Choose an integration vendor widget from the widget library and click Next.
-
Select the integration vendor from the drop-down list and select the widget you'd like to add. Click Next.
-
Complete the widget settings. For integration vendor widgets, the only thing you can change is the width. You can select a whole-tab widget if there are no other widgets already on the tab.
- Select Show me... . The What do you want to see? drop-down list is activated.
- Select a scenario from the list. The Add Widget page opens with a widget that offers data for the scenario you selected.
- Complete the widget settings. For a full description of settings, refer to Adding a new widget.
- Click Finish.
To access the widget menu, click the menu icon![]() . The following options are available:
. The following options are available:
| Menu option | Description |
|---|---|
|
Refresh |
Widgets are automatically updated every 5 minutes, or when a tab is opened. To refresh the widget manually, hover over the widget menu |
|
Offer |
Do you like a widget that a co-worker has added to a tab? Or, did you add a new widget that you know someone else would find useful? Users can "offer" widgets to each other and "accept" the offered widgets to add to your own Dashboard tabs. This feature is different from Shared Tabs. Refer to Offering widgets to other users. NOTE You cannot offer or accept widgets on shared tabs. |
|
Move to Other Tab |
NOTE You cannot move a widget onto a shared dashboard. |
|
Edit |
This option lets you edit all widget settings except the entity the widget is based on.
For a description of the options and fields in the Add Widget dialog, refer to Adding a new widget.
|
|
Copy |
This option lets you create a copy of the selected widget that you can rename and edit.
For a description of the options and fields in the Add Widget dialog, refer to Adding a new widget.
|
|
Remove |
This option lets you delete a widget:
TIP Deletion is permanent. |
- Move the cursor to the top left corner and hold down the left mouse key when the cursor changes.
- Drag the widget to the new position on the tab. Possible new positions will appear as gray rectangles. To drop the widget into its new position, release the mouse key.
NOTE Widgets on organization dashboard tabs can only be moved to other organization dashboard tabs, not to shared or custom tabs.
To delete a widget:
- From the dashboard tab: click the widget menu
 and select Remove from the menu. Confirm the deletion.
TIP Deletion is permanent.
