Adding or editing project or project phase notes
PERMISSIONS All Autotask Users who have access to the project
NAVIGATION Left Navigation Menu > Projects > Search > Projects > click Search > context menu > View Project > Notes > New
NAVIGATION Left Navigation Menu > Projects > Search > Projects > click Search > context menu > View Project > Schedule > Phase context menu > New > Note
IMPORTANT For important information about notes, refer to Using notes in Autotask.
To add or edit a project note or a phase note, do the following:
- To open the page, use the path(s) in the Security and navigation section above.
- Open the New Note page from the parent entity and populate the following fields:
| Element | Description |
|---|---|
|
The header section of a project note contains the project header icon, the unique project number, icons to copy the project number, the project URL, and the project number and project name to the clipboard, and the organization and project name of the parent entity. |
|
|
|
The header section of a phase note contains the phase/task header icon, the phase number, icons to copy the phase number and the phase number and phase number and the phase title to the clipboard, and the phase name and organization name. |
| Field | |
|---|---|
|
Title |
Creating titles using key words will allow you to find notes later in lists and searches. A setting on the General tab of the category will determine if a note title is required for task and ticket notes. Refer to Note Titles. Enter a Title for the note. |
|
Description |
On entities like ticket, task, note, and to-do, the Description field is a core part of the data record. Wherever it is available, it tracks essential information about the record. Enter the note text (up to 32,000 characters, 1 Million characters for task and ticket notes) into the Description field. For longer notes, you can re-size the field by grabbing the bottom right corner and dragging it down. |
|
Note Type |
Note types are categories applied to notes. They organize notes based on their parent entity, function, and who they are published to. Refer to Note types for more information. The Global Notes Search can be filtered by the Note Type field. Refer to Running a global notes search. On entities where you have a choice, accept the default or select a different Note Type from the drop-down list. |
|
Publish To |
The Publish type determines who can view notes or open attachments created by a resource (system notes visibility is determined by the viewer's security level). It is either inherited from the note type (but can be edited), or selected outright from the Publish To dropdown menu. The following options are available:
Attachments without a Publish To selector inherit the visibility of the parent entity. EXAMPLE When you add an attachment while editing a ticket note, the ticket note's Publish To option is applied to the attachment. |
|
Display this note as an announcement |
Select this check box to display the note in the Announcements section on the Project Summary page. Refer to Announcements section. |
In the Quick Notification (Notify via "To") section, you can use check boxes to quickly add common role-based notification recipients to the note or time entry notification email. The selected recipients are added to the To: field; CC: and BCC: fields are not populated.
The check boxes are shortcuts to manually selecting or clearing role-based recipients on the Notification panel. If recipients are added or removed from the To: field on the Notification panel, the matching role-based check boxes will become selected or cleared.
The name of the user who is filling the role is added to the role name. If more than one person is added, +# is added to the first name. If the ticket does not have a value for a role, the check box for that recipient will still be enabled, because they can still be selected on the Notification panel. Adding or changing a value for a recipient via the Quick Ticket Edits section will cause the names next to that check box to be added or changed accordingly.
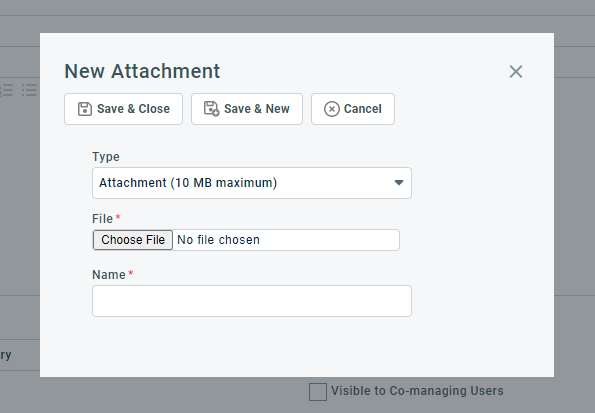
In this section, you add new attachments. They are saved as replies to the note or time entry they are added to.
The Add New Attachments section is always collapsed. When it is expanded on the New Note or New Time Entry form, the New Attachment dialog box will open automatically.
-
Complete the New Attachment dialog box. As you save each attachment, it will appear on the attachment table. Refer to Adding and managing attachments.
-
On notes that can become a notification email, attachments can be included. To attach the new attachment to the notification email, select Include Attachments in Email on the notification panel. You can make this a default setting.
-
To complete the attachment process, you must save the note or time entry. If you close without saving, the attachments will not be uploaded or attached to the parent entity.
NOTE When opened from the Ticket Time Entry dialog box or page, you can select the Internal Only check box. On the Note dialog box or page, this check box is missing and the attachment inherits the setting of the note.
This section appears when you edit a project note that has existing attachments. Refer to Managing Attachments.
The New and Edit pages for each entity feature a notification panel that is accessed from a persistent handle at the bottom of the page.
For more information, refer to Notification panel.
- Click Save. The note is added to the Notes table of the entity.


