Settings
PERMISSIONS All users
NAVIGATION Click your name in the upper right corner of the top navigation bar > My Settings
NAVIGATION My > Miscellaneous > Settings
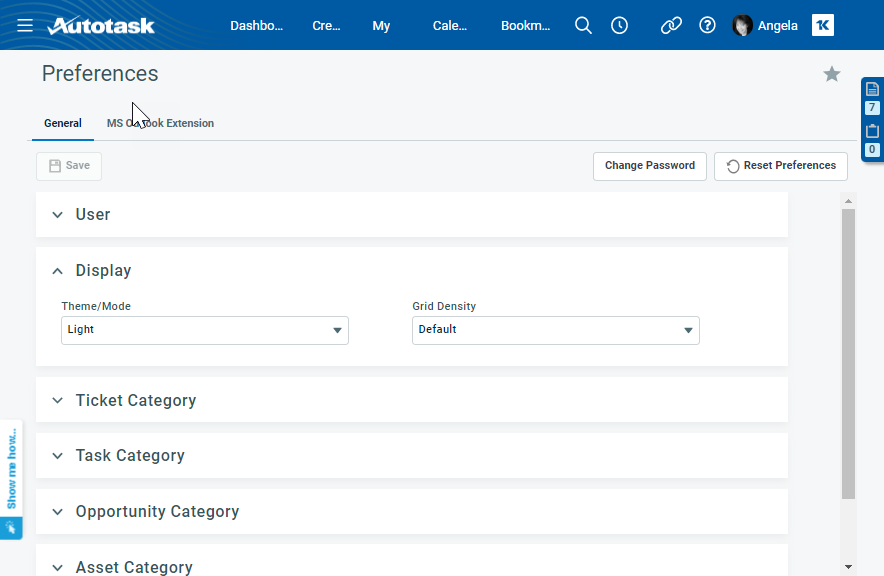
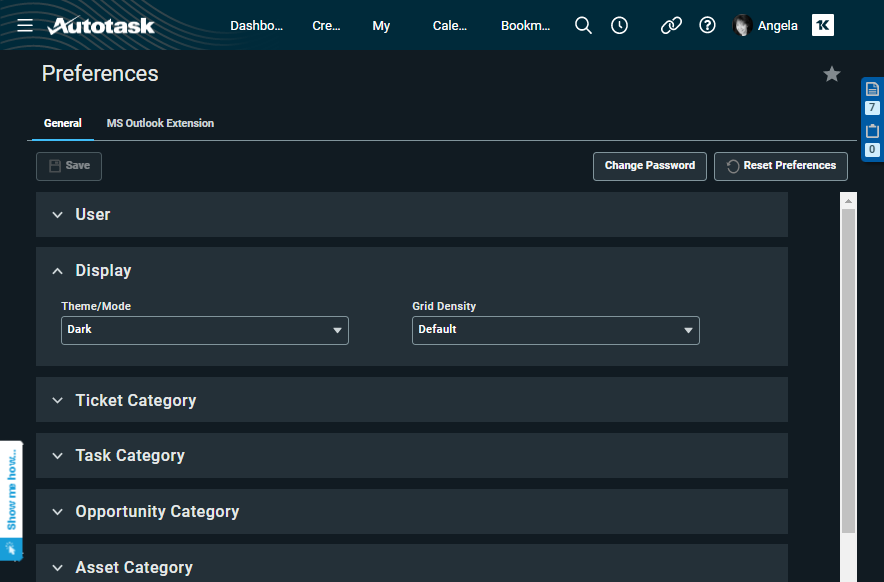
The Settings page lets you customize your user settings in Autotask. It consists of a task bar and a number of expandable sections. To open the page, use the path(s) in the Security and navigation section above.
The General tab
You can change your Autotask password at any time. In addition, your Autotask administrator may have enabled system settings that prompt you to change your password every so often.
To change your password, take the following steps:
- To open the page, use the path(s) in the Security and navigation section above.
- Click Change Password.
- In the Change Password window, enter your current password and then enter and confirm your new password.
TIP Your new password cannot be the same as your 5 previous passwords, even if a strong password is not required.
If your Autotask administrator has implemented a strong password requirement, a list of the requirements is displayed. Refer to Strong password requirements for more information.
- Save & Close. The new password will take effect with the next log in.
TIP If you forget your password, go to the log in page, enter your username, and click the Forgot password link. If you've forgotten your user name, ask your Autotask administrator to look it up for you.
Autotask stores a number of user settings in your Autotask instance, including column chooser settings, notification template defaults, search table default criteria, default checkbox and radio button selections, and column selections for some standard reports.
To reset those settings to the default, do the following:
- Click Reset Settings.
- A confirmation dialog box will open.
- If you click OK, your saved user settings will be deleted, and settings will be reset to the Autotask default settings. Otherwise, click Cancel.
| Field | Description |
|---|---|
| Homepage | When you log in for the first time, the default dashboard for your security level is displayed. Click the drop-down menu and select another page or dashboard. The available options are determined by your security level. |
| Organization Landing Page | Your selection here will determine if the Organization page opens to the Detail or the Dashboard view. Refer to The Organization page. |
| Division > Line of Business |
If your company uses lines of business and you are associated with a specific one, selecting it here will ensure that it will be the default when you create an item or entity that can be associated with one. Refer to Setting the line of business on an entity. The drop-down menu contains all active division > line of business pairings you are associated with, plus the current selection (even if it is inactive or no longer associated with you). Your default selection will override any default line of business selected on the ticket category. However, if the ticket category does not include your line of business in its picklist, it will not be applied. IMPORTANT This default setting is intended to automate what a resource could otherwise do manually, so it doesn't get applied to hidden fields. |
|
Date Format |
Date format determines how dates are displayed to the user. It defaults to the format selected for the internal location the user is associated with. For details on how Autotask manages date and time formats, refer to Date and time entry format rules. NOTE To modify the date, time, and number formats for multiple resources, refer to Internal locations. NOTE To modify the date, time, and number formats for multiple resources, refer to Internal locations. |
|
Time Format |
This field determines how time is displayed for the user. It defaults to the format selected for the internal location the user is associated with. For details on how Autotask manages date and time formats, refer to Date and time entry format rules. Choose between AM/PM (with and without leading zeros), and military time format. NOTE To modify the date, time, and number formats for multiple resources, refer to Internal locations. |
|
The number format determines whether the decimal separator is a period or a comma. It defaults to the format selected for the internal location the user is associated with. Choose between period and comma as the decimal and thousands delimiter. NOTE To modify the date, time, and number formats for multiple resources, refer to Internal locations. |
|
|
Use tabs or full browser windows instead of popups where possible (browser settings will be respected) |
When selected, new pages will open in a tab or full browser window where possible. Your browser's settings will be respected. |
| Open ticket/task time entries and notes inside the ticket/task window |
When this checkbox is selected, the New/Edit Time Entry and New/Edit Note windows will open as a dialog window inside of the Ticket or Task page, rather than in a separate browser window. Refer to Adding a ticket time entry and Adding a note to a task or ticket. This setting is enabled for all users by default. |
| Enable right-click menus in grids (your browser's right-click functionality will no longer be available in grids) |
Select this check box if you would like to enable right-click menus in addition to context menus. You don't have to scroll to the context menu icon and can right-click anywhere on the row to display the menu. |
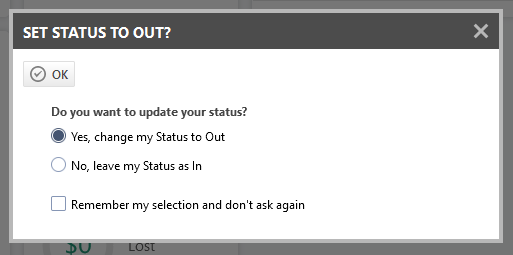
| Prompt me to change In/Out status when logging out |
When you log out of Autotask for the day, a prompt asks you if you want to set your status to Out or remain In. If you enable the prompt, you will see this message every time you log out: Use the radio buttons to update your status.
|
In the [Entity] Category sections, you can select the personal default categories that will be applied to the tickets, tasks, opportunities, devices and organizations you create. You can choose the system default or any other category available to you. If you are not familiar with categories, refer to Introduction to Categories.
NOTE Users who are assigned a Co-managed security level, or a security level that has a Render as... task or ticket category assigned are not able to change their default task category or ticket category. The radio button is disabled and the Use other radio button is selected. The All Available Ticket Categories panel contains only the user's Ticket Category Override or Render as... category. Refer to Co-managed setup and Render all Tickets as Ticket Category:.
| Option | Description |
|---|---|
| Use system default | When you select this option, the system default category is always used. |
| Use other: | This option lets you select another specific category as the default. |
| Prompt me |
If you create items using multiple categories, select the Prompt me option. When you select this option, you can create a list of your favorite entity categories.
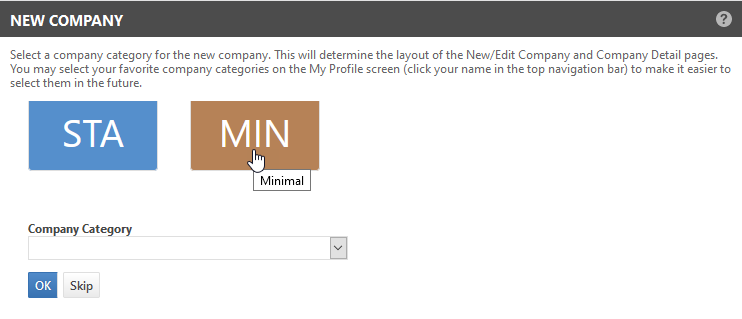
With this setting, an additional category prompt page opens before the main New [Entity] page. It displays your favorites on squares of the colors assigned to the categories. From there, you can choose a category. Refer to Using the Category Prompt page. |
Using the Category Prompt page
If you selected Prompt me instead of a default for an entity category, an additional page opens before the appropriate entity page.
The page displays a button for each category that you selected as a favorite. Each button is the color associated with the category and displays the category's three letter Nickname.
- Click a button to select the category.
or
Select a different category from the menu of all available categories.
- Click OK to save your selection, close the prompt page, and open the New [Entity] page, or click Skip to close the prompt page without a selection.
If you click Skip, the New [Entity] page opens using the System Default category.
- If needed, you can select a different category from the [Entity] Category field, but you cannot return to your favorites on the prompt page.
NOTE If a user with a Co-managed security level has a Ticket Category Override configured, the Prompt me and Use system default radio buttons are de-selected and disabled. The Use other radio button is selected. The All Available Ticket Categories panel contains only the user's Ticket Category Override.
The MS Outlook Extension tab
On this tab, users can see a list of all instances of the MS Outlook Extension associated with their user account. They can also end any sessions that are no longer needed.
The list is sorted by descending order (oldest to newest), based on the Last Activity date.
-
To close a session, click the Delete icon
 in the first column of the row.


