Adding a note to a task or ticket
PERMISSIONS Ticket access
NAVIGATION Left Navigation Menu > Service Desk > Search > Tickets > click Search > open a ticket > Quick Add bar > select Note (Alt+2)
NAVIGATION Left Navigation Menu > Projects > Projects > search for a project > click on the Project Name > Schedule > task context menu > General > View Details > Quick Add bar > select Note (Alt+2)
IMPORTANT By default, notes and time entry pages launched from a task or ticket in New, Edit, or View mode open in a modal dialog box. For information about dialog boxes and how they differ from browser pages, refer to Minimizing Dialog Boxes.
Adding or editing a note
To open the page, use the path(s) in the Security and navigation section above.
| Button or field | Description |
|---|---|
|
Save & Close |
Saves the note or time entry and closes the dialog box. IMPORTANT If the New/Edit Time Entry or New/Edit Note dialog is saved on the Edit Task or Edit Ticket page, both the details panel and main canvas will be updated. Any unsaved changes in those areas will be kept. Any changes to the Status or Quick Edit fields made on the time entry or note will also be applied to their corresponding ticket fields. If a status or quick edit field supplied by the dialog fields conflicts with an unsaved change on the Edit Ticket page, the dialog’s value will be used. |
|
Save & New |
Saves the note or time entry and opens a new dialog box. |
|
Save & Forward/Modify (tickets only) |
Saves and closes the note or time entry and opens the Forward/Modify Ticket(s) page. Refer to Forwarding and modifying tickets. NOTE If the Ticket Note or Ticket Time Entry page is opened from the Edit Ticket page, Forward/Modify is disabled. |
|
Change Task (task time entries only) |
Click Yes on the Warning dialog.
|
|
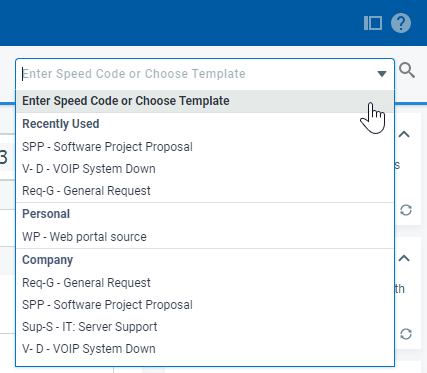
Enter Speed Code or Choose Template |
Form templates follow the limitations of the currently applied category and the user's security settings. If a form template uses a value or provides content that is not allowed in a field by the category or the user's security settings, the field will not be updated. This includes the category field itself. IMPORTANT Selecting a form template is the equivalent of manually populating the form. Form template settings will override any previously populated field content, including notification settings, additional contacts, and secondary resources. |
| Element | Description |
|---|---|
|
|
The entity header identifies the parent entity the note or time entry is associated with. It shows the Task Number or Ticket Number, Task Title or Ticket Title, and Organization fields, plus the quick copy icons. |
|
Stopwatch |
The stopwatch starts running as soon as you open the task, ticket or time entry page. For detailed information, refer to The task or ticket stopwatch. If the setting Enable [Entity] Stopwatch is cleared for the entity category, the stopwatch will not appear. |
| Field | Description |
|---|---|
|
Status |
The Status defaults to the current status of the parent entity when the page or dialog box is opened. The value you select will be set as the status of the parent entity when the dialog box or page is saved.
Special situations:
|
|
Status as of <date/time stamp> |
The date/time stamp indicates the date and time the status was last refreshed from the task or ticket. If you have not clicked the Get current Status link, it will be the date and time you opened the page. |
|
Get current Status |
If the time entry page is open for a long time, it is possible for the Status field to be changed by another user or a workflow rule.
|
|
Update Status on {#} incident(s) (tickets only) |
This check box will only appear if the ticket to which the note or time entry is being added is a problem ticket with at least one incident. If you open this dialog box or page from the Edit Ticket page, this check box will not appear. If the Can edit Status of Complete tickets (does not apply to Autotask Web Services/API) permission is cleared for your security level, you can update the status of incomplete incidents. If it is selected, you can update the status of all incidents. |
| Field | |
|---|---|
|
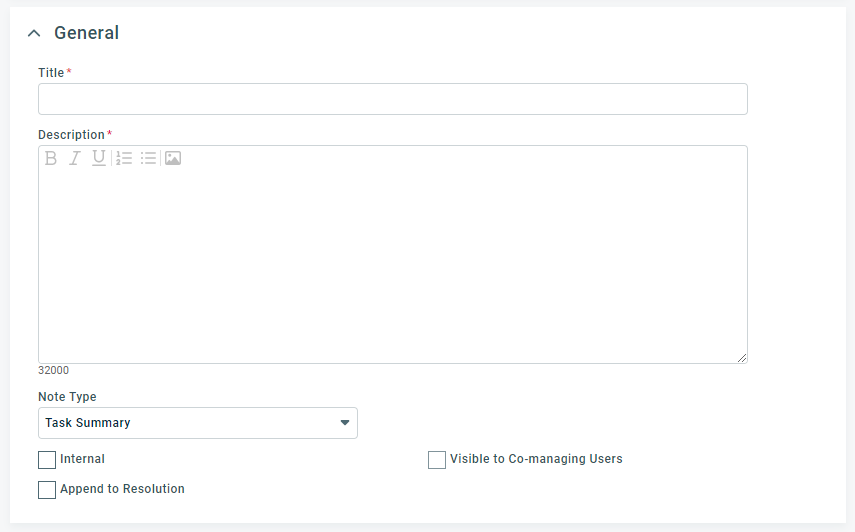
Title |
Creating titles using key words will allow you to find notes later in lists and searches. A setting on the General tab of the category will determine if a note title is required for task and ticket notes. Refer to Note Titles. Enter a Title for the note. |
|
Description |
On entities like ticket, task, note, and to-do, the Description field is a core part of the data record. Wherever it is available, it tracks essential information about the record. Enter the note text (up to 32,000 characters, 1 Million characters for task and ticket notes) into the Description field. For longer notes, you can re-size the field by grabbing the bottom right corner and dragging it down. |
|
Note Type |
The Note Type field defaults to Task Summary. You can select a different note type from the drop-down list. All active note types of the category Task are available, plus the current selection even if it is inactive. If you select a different note type, keep in mind that it might be set to a different Publish option. Review the setting of the Internal Only check box. Special situations:
|
|
Internal |
This check box appears on task notes, ticket notes and both task and ticket quick notes and quick replies. It controls who can view the note.
Select the check box to hide the note from customer contacts and co-managing resources. |
|
Visible to Co-managing Users |
This check box is enabled when the Internal check box is selected. If it is selected, the note is created with the Internal & Co-managed publish type. NOTE This field is visible only if Co-managed Help Desk is enabled on the Activation page, and only shown to resources who are not co-managed. IMPORTANT When this feature is released, we will change the Publish settings of ticket and task notes and attachments to Internal & Co-managed for all tickets and tasks where the Co-managed Visibility is set to Visible. Check the box to make the note visible to co-managing resources, but not customers. |
|
Append to Resolution (tickets only) |
If selected, the text entered into the Summary Notes or Description field will be added to the end of the Resolution field of the ticket. If there is already text in the Resolution field, two line breaks will separate the existing text from the text added. Security: This check box is available even if users do not have permission to edit tickets. NOTE If Knowledge Base is enabled and the ticket is used to create a Knowledge Base article, the contents of the Resolution field appear in the article. Refer to Creating Knowledge Base articles from tickets. |
|
Append to Resolution on # incident(s) (tickets only) |
This check box only appears for notes and time entries on problem tickets associated with one or more incidents. If selected, the text entered into the Summary Notes (on time entries) or Description field (on ticket notes) will be appended to the end of the Resolution field on all of the ticket’s incidents. |
|
Also create Note/Attachment on # incident(s) (tickets only) |
This check box only appears for notes and time entries on problem tickets associated with one or more incidents. If selected, the note's Description or the time entry's Summary Notes, Internal Notes, and any new attachments are added to the ticket's incidents, as well. On the incidents, the Internal Notes are created as a reply to the Summary Notes. Security: This check box is available even if users do not have permission to edit tickets. |
In the Quick Notification (Notify via "To") section, you can use check boxes to quickly add common role-based notification recipients to the note or time entry notification email. The selected recipients are added to the To: field; CC: and BCC: fields are not populated.
The check boxes are shortcuts to manually selecting or clearing role-based recipients on the Notification panel. If recipients are added or removed from the To: field on the Notification panel, the matching role-based check boxes will become selected or cleared.
The name of the user who is filling the role is added to the role name. If more than one person is added, +# is added to the first name. If the ticket does not have a value for a role, the check box for that recipient will still be enabled, because they can still be selected on the Notification panel. Adding or changing a value for a recipient via the Quick Ticket Edits section will cause the names next to that check box to be added or changed accordingly.
If the ticket category was configured to display them, additional ticket fields appear in this section on time entries and notes. The ticket category controls which fields appear here and in what order. It also controls if this section is automatically expanded when the time entry or note is opened for creating or editing. For more information, refer to Time Entry/Note Quick Edit Fields.
The current data is loaded when the section is first expanded. If the time entry dialog box is open for a long time, the Quick Edit fields can be changed by another user or a workflow rule. Click Get current values to update field values.
The section will not appear at all if:
- you opened the Time Entry or Note page from the Edit Ticket page
- you don't have permission to edit tickets
IMPORTANT Fields that are not visible cannot be validated. If the Quick Ticket Edits section remains collapsed, you can save the note or time entry without completing required fields. You can modify the ticket category to ensure that the section is expanded when the time entry or note is first opened and that required fields are completed. Refer to Time Entry/Note Quick Edit Fields.
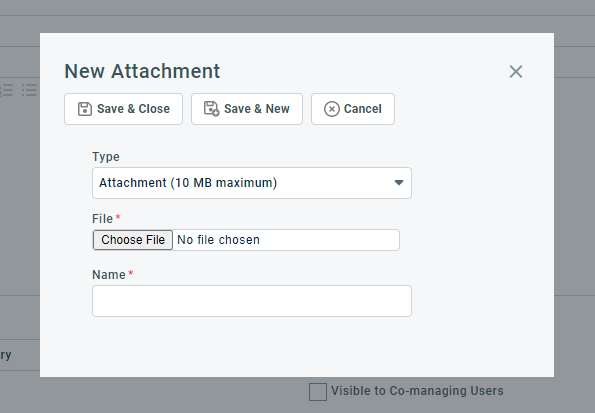
In this section, you add new attachments. They are saved as replies to the note or time entry they are added to.
The Add New Attachments section is always collapsed. When it is expanded on the New Note or New Time Entry form, the New Attachment dialog box will open automatically.
-
Complete the New Attachment dialog box. As you save each attachment, it will appear on the attachment table. Refer to Adding and managing attachments.
-
On notes that can become a notification email, attachments can be included. To attach the new attachment to the notification email, select Include Attachments in Email on the notification panel. You can make this a default setting.
-
To complete the attachment process, you must save the note or time entry. If you close without saving, the attachments will not be uploaded or attached to the parent entity.
NOTE When opened from the Ticket Time Entry dialog box or page, you can select the Internal Only check box. On the Note dialog box or page, this check box is missing and the attachment inherits the setting of the note.
If you edit a note or time entry that is associated with existing attachments, they appear in a separate Attachments section. This section will be expanded if the note or time entry has at least one attachment. It will not appear on the New Ticket Note or New Ticket Time Entry form.
All users can view attachments they uploaded. To view attachments uploaded by other users, Can view Ticket and CRM notes and attachments marked as "Internal Only" and "Internal & Co-managing" or Can view Task notes and attachments marked as "Internal Only" and "Internal & Co-managing" permission is required.
The New and Edit pages for each entity feature a notification panel that is accessed from a persistent handle at the bottom of the page.
For more information, refer to Notification panel.
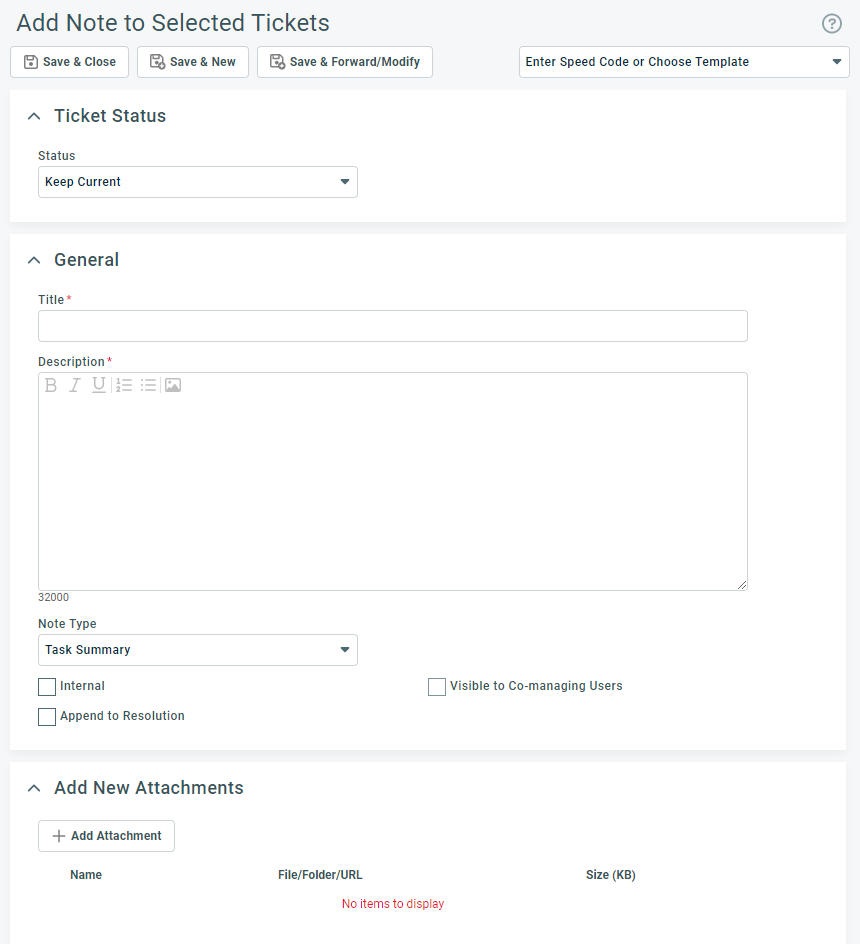
Adding a note to selected tickets
On ticket tables, you can select the Add Note to Selected Tickets option from the bulk menu. This selection opens a page that contains a subset of the fields documented above.
The fields that do appear show the following differences:
| Field | Description |
|---|---|
| Enter Speed Code or Choose Template | Only form templates that are available to all selected tickets’ categories can be selected. |
| Status |
A Keep Current option is available and is the default. Additionally, only those statuses that are available to all selected tickets’ categories are available for selection. If you set the status of selected tickets to Complete, and one or more tickets have incomplete to-dos, a confirmation message will ask if you want to complete associated to-dos. If you select Yes, all incomplete to-dos for the ticket to be set to complete when the note is saved. |
| Update Status on {#} incident(s) | Only the incidents of problem tickets will have their status updated. Incidents on Change Request tickets will not be updated. |
| Also create Note/Attachment(s) on # incident(s) | The attachments will only be added to the incidents of problem tickets, not incidents of Change Request tickets. |
| Append to Resolution on # incident(s | The note will only be added to the incidents of problem tickets, not incidents of Change Request tickets. |
Searching for and viewing notes
Notes can be searched and viewed from one place using the Global Notes Search, accessed from Left Navigation Menu > Home > Search > Global Notes Search or Left Navigation Menu > Reports > Other > General. Refer to Running a global notes search.


 Task or
  Ticket entity header


