Reports about resource utilization and productivity
PERMISSIONS Refer to Required Permission for each report
NAVIGATION Refer to Path for each report. Note that LiveReports may be published to any report category or multiple report categories, or may not be published at all in your Autotask instance. To publish a LiveReport, refer to Publishing LiveReports.
TIP The First Day of Week is a location-level setting. An administrator can select Monday as the First Day of the Week for your location. Refer to Internal locations.
Standard reports
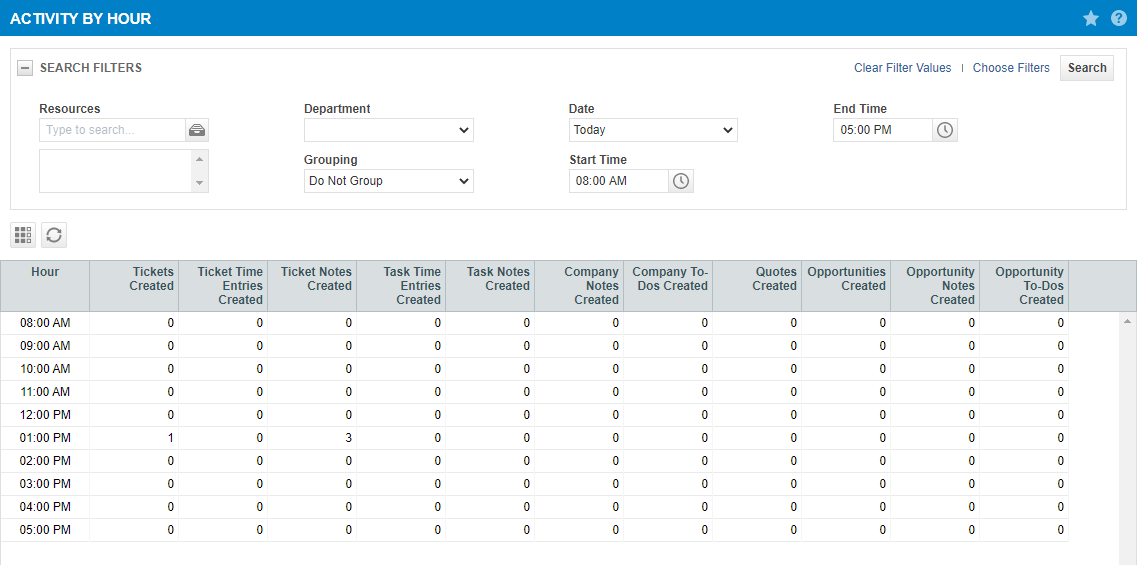
 Activity by Hour
 Workload report
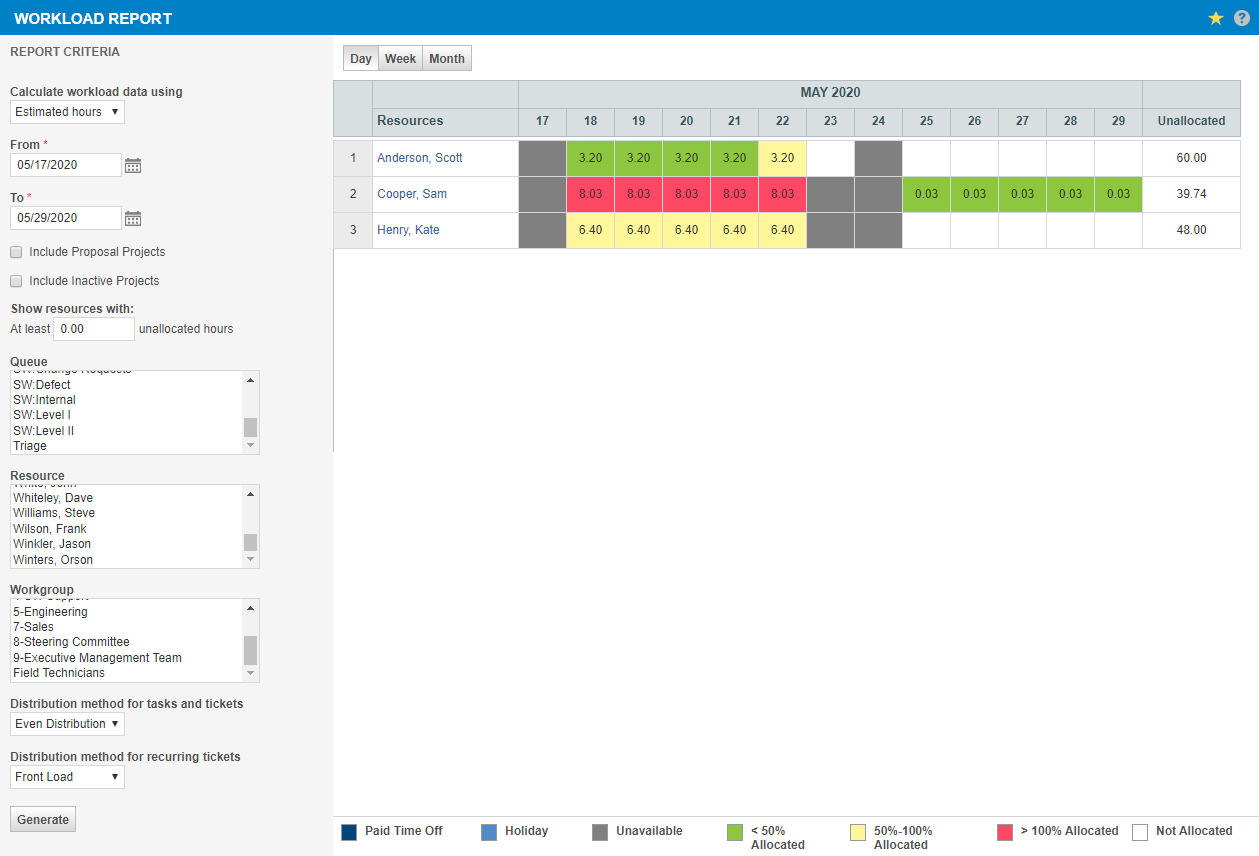
The Workload Report informs you how busy your resources are expected to be in the future, based on the tasks and tickets they are assigned to, and how long the work is estimated to take.
The Workload Report can provide meaningful data only if your company estimates time on all tasks and tickets. If the Estimated Time field in tasks and tickets is not populated, that task or ticket is estimated to take zero hours to complete. It takes only a small number of missing time estimates to completely falsify a Workload Report.
In the left panel, complete the report settings:
| Field | Description |
|---|---|
| Calculate workload data using |
Here you select the hours that you are looking to cover.
NOTE Once the task or ticket status is set to Complete, the Workload Report will not show any remaining estimated hours on the task or ticket. |
|
From |
These fields define the time period the Workload Report will cover. |
|
Include Proposal Projects |
To include the hours your resources are scheduled in any proposal projects or inactive projects in your calculations, select the appropriate check boxes. |
|
Show Resources with: |
To exclude resources with few or no unallocated hours from the report, enter the minimum number of hours a resource should have available to be included. |
|
Queue, Resource, and Workgroup |
These fields allow you to filter your resources by name, or based on association with a queue or workgroup. Selection is additive. All selected resources, plus members of selected queues and workgroups will be listed. |
|
Distribution method for tasks and tickets Distribution method for recurring tickets |
Most often, there are multiple days between a task's start date and end date, and a ticket's create date and due date. Autotask cannot know how many hours a resource will be working on any one task or ticket on each of the days in between. For planning purposes, you can select one of the following distribution methods:
|
| Generate |
Click this button to generate the report with the current settings. |
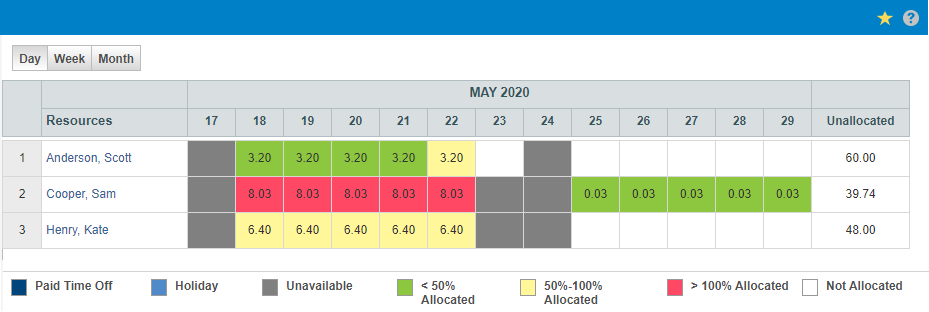
At the top of the report, toggle buttons let you select how you want to view resource availability: by the day, week, or month.
At the bottom, a legend explains the color coding of each cell.
- To see the data for an individual resource, click on their name in the report to open a view of the workload report for that resource.
- Hover over any task name to see the organization and project it is associated with.
- Hover over any ticket name to see the ticket number.
Click on the task or ticket name to open the item.
Let's illustrate that with the following scenario:
- A resource is assigned a task or ticket with a 10-hour estimate.
- The Create Date/Start Date is Monday, the Due Date/End Date is Friday.
- The resource works 8 hours per day every day that week.
- It is now Wednesday, and the resource has entered 4 hours of labor on the task/ticket on Monday.
- The time specified for the Workload Report is From: Monday To: Friday.
Depending on the selection in the "Calculate workload data using" field and the selected distribution method, the workload report for the week will show the following:
If a resource is working on multiple tasks and tickets at the same time and you are using Front Load or Back Load distribution, then the calculation and distribution of workload is not precise. It divides that day's availability by the number of assigned tasks or tickets. The calculation method is not going to take into consideration that one of those tasks or tickets has fewer hours remaining. As a result, it cannot increase the time devoted to the other tasks or tickets to use up all available resource hours.
EXAMPLE The resource has 3 tasks, and 8 hours of available time. The report allocates 2.67 hours per task. If one task only takes 1 hour, the leftover time is not re-allocated to the other two tasks.
This is a forecasting tool that is, unfortunately, not meant to be fully precise.
When a resource is unavailable (on vacation or has approved time off), and they are scheduled for a task whose duration falls entirely within the unavailable time, the task will still be displayed on the Workload Report, but it will be clear that it falls within an unavailable time period. The estimated hours will be shaded in the color that indicates the resource is > 100% allocated.
The create date for recurring tickets is determined by the settings of the recurring ticket template. Unless you specify the creation of instances a certain number of days before the due date, that date is when the recurring ticket template is created, possibly months before the due date. Refer to Creation. For this reason, the distribution method for recurring tickets defaults to Back Load. You should only change this setting if you always create the instances (tickets) a certain number of days before the due date.
If the ticket being created is a weekly or monthly recurring ticket and the recurring ticket template is created halfway through the first recurrence period, Front Load, Back Load and Even Distribution are honored, but the workload will be distributed over the remaining days.
For tasks, the number of hours that appear on the Workload Report depends on the task type and the number of resources assigned to the task.
| Task Type | Calculation | 1 resource assigned to task | 2 resources assigned to task | 3 resources assigned to task | Total Estimated Hours |
|---|---|---|---|---|---|
| Hours on the Workload Report for each resource depend on the number of Assigned Resources and the Task Type | |||||
| Fixed Work
The amount of work in a task is finite, and the workload is split up between all assigned resources. An example of a task of type Fixed Work is "Unload equipment from delivery truck". |
Total Estimated Hours / # of Assigned Resources | 3 | 1.5 | 1 | 3 |
| Fixed Duration
The duration of the task does not depend on the number of resources. This is typical for meetings, where each attendee is spending the duration of the meeting. |
Hours per Resource * # of Assigned Resources | 3 | 3 | 3 | 3 * # of Assigned Resources |
For more information on task type, estimated hours and the number of assigned resources, refer to Adding or editing a task.


IMPORTANT The columns, calculations, and definitions that follow are specific to this report.
TIP The criteria check box Include adjustments in Client columns refers to Labor adjustments made on the Labor Adjustment page. Refer to Adjusting posted labor items.
| Column | Description |
|---|---|
| Summary | |
|
Resource Name |
The list of resources cannot include the Autotask Administrator. IMPORTANT Difference: in LiveReports, API and Dashboard users are not included in the results. IMPORTANT Difference: If you add a department filter to the LiveReport, the report will include only the resources for whom it is the default department. The standard report includes all department associations, default or not. |
| Available Hours |
Total available work hours for the selected date range, based on the Daily Availability settings on the Resource Setup > HR tab. |
| Billable Hours Goal | The Weekly Billable Hours Goal established on the Resource Setup > HR tab, prorated for the selected date range. |
| Paid Time Off Hours |
The Paid Time Off hours include:
Internal time codes that have a check mark in the Display Code for: Time Off Requests column are NOT considered Paid Time Off. |
| Adjusted Available Hours |
Available Hours minus Paid Time Off Hours for the selected date range. IMPORTANT Difference: If the Paid Time Off Hours > Available Hours, the standard report will show a negative number, while the LiveReport will show 0 hours. |
| Adjusted Billable Hours Goal | Billable Hours Goal, prorated against Adjusted Available Hours
|
| Total Hours Worked |
All hours tracked by a user that are not either a holiday, or paid time off.
NOTE Total Hours Worked may differ from the total time listed on resource timesheets if you choose to round the Time Worked for billing purposes, but not on resource timesheets. |
| Total Percent Utilized |
Total Hours Worked, as a percentage of Adjusted Available Hours.
|
| Internal | |
| Internal Hours |
Internal Hours include:
NOTE If you need to charge another department in your company for work done and track that as billable time, you should set up a customer organization for that department. |
| Internal Percent Utilized | Internal Hours, as a percentage of Adjusted Available Hours
|
| Client | |
|
Client hours can be reported either with, or without, any adjustments made to posted (or even invoiced) labor hours. Refer to Adjusting posted labor items.
NOTE If labor adjustments are included, this is indicated on the standard report in the row below the header row.
|
|
| Client Billable Hours Worked (CBHW) |
All billable hours worked on client tasks and tickets, including:
To include labor adjustments with the Client Billable Hours Worked, do the following:
EXAMPLE CBHW = 100, total labor hours adjusted = -30, Adjusted CBHW = 100 - 30 = 70. |
| Client Non-Billable Hours Worked | All hours worked on client tickets and tasks with a non-billable work type, or submitted as a non-billable time entry, regardless of the role rate. NOTE Positive offsets and labor applied to fixed price or recurring service contracts are not included. These contract hours may have a non-billable billing code or be submitted as non-billable time entries, but they are included as Client Billable Hours Worked (CBHW) when calculating resource performance against billable hours goals. |
| Total Client Hours Worked |
All hours worked on client tickets and tasks.
|
| Client Gratis Hours |
Gratis hours mean hours that are given away for free. Only hours with a billable work type or no work type (where they default to billable) can be Client Gratis Hours. IMPORTANT Difference:
There are two ways to create gratis hours in Autotask:
|
| CBHW Minus Gratis Hours |
The number of Client Billable Hours Worked that was actually billed.
|
| Total Client Percent Utilized |
Total Client Hours as a percentage of Adjusted Available Hours.
NOTE Labor adjustments do not impact Adjusted Available Hours (Available Hours minus Paid Time Off Hours for the selected date range). |
| Client Billable Percent Utilized |
Client Billable Hours as a percentage of Adjusted Available Hours.
|
| Client Non-Billable Percent Utilized |
Client Non-Billable Hours as a percentage of Adjusted Available Hours.
|
| Performance Against Goal |
On the standard report, this value depends on the system setting Reduce resource billable hours goal by reduction in available hours (applies to Performance Against Goal calculations in Dashboards and Resource Utilization Report). IMPORTANT Difference: The LiveReport does not take the system setting into account. Instead, it always shows an additional column, Adjusted Performance Against Goal. If this setting is enabled:
If this setting is disabled:
|
|
Adjusted Performance Against Goal (LiveReports only) |
Adjusted Performance Against Goal = (Adjusted CBHW)/(Adjusted Billable Hours Goal) * 100 |
| Billable Hours Goal % |
Billable Hours Goal as a percent of Available Hours:
Labor adjustments do not impact the Billable Hours Goal %. |
| Posted | |
| Hours Posted | All time posted, including labor adjustments, regardless of billable or non-billable status |
| % Posted |
Hours Posted as a percent of Total Worked Hours:
NOTE It is possible that this value could be greater than 100%. If the amount of time billed was increased during the Approve & Post process (for example, if a technician worked ½ hour, but you bill customers for a minimum of 1 hour), that time would then show as greater than 100% Posted. If the time is reduced in Approve & Post, then % Posted will not reach 100%. |
LiveReports
| Required Permission | The report must be published to you, your department, or your security level. The data in the report is subject to the restrictions of the user's security level, and may be different for each user. |
|---|---|
| Path | Left Navigation Menu > Reports > LiveReports Designer > System Reports > Resource Utilization > Resource Utilization |
| Description |
This report shows the percent utilization for each resource. For column descriptions, refer to Column descriptions for the resource utilization report (applies to standard report and LiveReport). This system LiveReport is designed to generate similar results as the standard Resource utilization report, which it will replace in the future. It offers more filtering, output, and publishing options than the standard report, and can be copied, modified, and scheduled.
Differences to the standard Resource Utilization report are pointed out in the column descriptions. The most important ones are:
|

|
|


