The Opportunity page
PERMISSIONS Security level with access to CRM and Opportunity object permissions
NAVIGATION Left Navigation Menu > CRM > Opportunities > Search > click on an opportunity or context menu > View > Opportunity
NAVIGATION Left Navigation Menu > CRM > Search > Organizations > click Search > click an organization name > accessory tabs > Opportunities > click on an opportunity
An opportunity in Autotask represents a potential sale. The opportunity page provides the features to track and manage an opportunity and all entities associated with it.
Your view of an opportunity is controlled by the opportunity category that is applied to the opportunity. The opportunity category can improve your workflow by controlling what fields and elements appear on the opportunity page, how they are grouped, and in what order. Additionally, it determines which insights appear, providing useful information about entities related to the opportunity and financial forecasts. The opportunity category also controls what default values are automatically entered into the fields and may limit selections in drop-down lists. It is possible for fields to be hidden, and default values may be entered in those hidden fields. Refer to Adding and editing categories.
To open the page, use the path(s) in the Security and navigation section above.
For information on the general page layout and common elements on all entity pages, refer to Entity Page Layout.
Below the title bar is a row of task buttons.
| Name | Description |
|---|---|
| Edit | Click to launch the Edit Opportunity page where you can modify opportunity information. Refer to Adding and editing opportunities. |
| Tools |
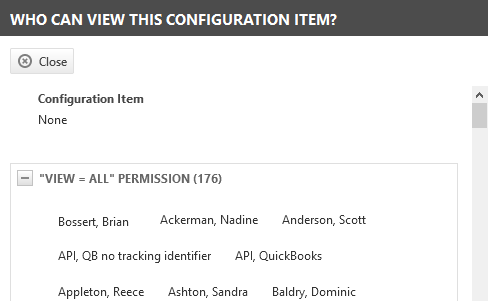
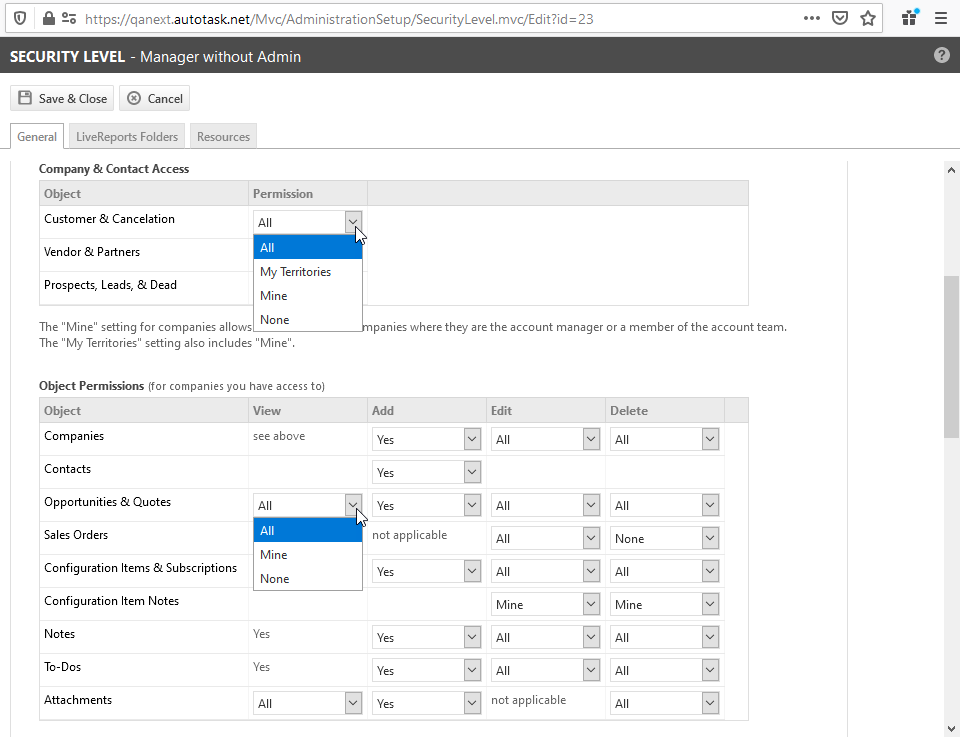
Click Opportunity History to view a comprehensive history of changes that have been made to the opportunity, including the date, the change, and who made the change. Refer to Entity History. On the Tools menu of organizations, devices, opportunities, and sales orders, a Who can view this [entity name] link appears. Click this link to learn which users have permission to view this item. View permissions for organizations are determined by the Organization & Contact Access settings of the user's security level, and for opportunities, sales orders, and devices, by the Object Permissions. Refer to CRM security settings. |
| Win Opportunity | Click to launch the Won Opportunity Wizard. Refer to Closing opportunities you have won. |
| Lose Opportunity | Click to close an opportunity you have lost. Refer to Setting an opportunity as lost. |
| View Assessment | Click to view the Assessment page for this opportunity. If the Assessment/Sales Process module has not been enabled, this button will not appear. For detailed information, refer to Assessing opportunities . |
| View Sales Process | Click to open the Sales Process page for this opportunity. If the Assessment/Sales Process module has not been enabled, this button will not appear. For detailed information, refer to Assessing opportunities . |
| View Primary Quote | Click to open the primary quote. Refer to The Quote (Quote Item) page. |
| LiveLinks | Click to open the menu of all Opportunity LiveLinks published to the user. Click a LiveLink to launch it. Refer to LiveLinks. |
Refer to Quick Add bar.
If the contact (or the contact associated with the opportunity or to-do you are viewing or editing) has opted out from receiving sales solicitations, you will see a pink banner displayed at the top of the page. On an opportunity, this banner appears if the associated contact has opted out of sales solicitations, even if the contact field is hidden by the opportunity's category.
IMPORTANT Note for partners in the European Union: Under the EU General Data Protection Regulation, your customers have a right not to be contacted that is enforced by steep penalties. This banner enables you to distinguish customers who have opted out, but you must implement business practices to comply with the Regulation.
Also refer to Message bar.
The main panel is in the center of the opportunity page. It contains the header and accessory tabs. Depending on the settings of the opportunity's category, it may also display a Timeline and a Checklist.
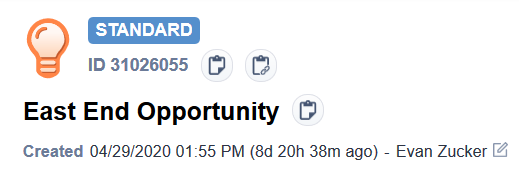
At the top of the main panel area, the following information is displayed:
| Field | Description |
|---|---|
| Opportunity Category | The category that has been applied to the opportunity. The category controls what fields and elements of the opportunity you see and in what order on the page. It may also limit what values are available in picklists and what default values are used when the opportunity is created or the category is applied, even in hidden fields. |
| ID Number | Unique identifier for the opportunity. This is system-generated and cannot be modified. |
| Name | The name of the opportunity. |
| Quick Copy Buttons |
There are four Quick Copy buttons on the opportunity detail page:
|
| Create Date |
Create Date is a system field that is automatically populated when the opportunity is created in Autotask. It cannot be modified. Create Date may be different than the Start Date field, which is entered on the details panel and reflects the date you want to start tracking the opportunity. The Start Date field is used in forecast and pipeline reports. The Create Date is used on the opportunity Timeline. |
|
Opportunity Creator |
The name of the resource who originally created the opportunity. |
The description field can be used to track more detailed information about the opportunity.
The timeline is a graphical representation of the stages and status changes that occur as you work to close an opportunity. Refer to The Opportunity Timeline
The checklist outlines steps to be taken as you pursue the opportunity. Depending on the opportunity category settings, a checklist may or may not appear at all. Refer to The checklist
The details panel for the opportunity is located to the left of the main panel. It contains a fixed header and additional sections that can be expanded and collapsed. Refer to The Details panel.
For more information on the fields that appear in this section, refer to The Details panel field definitions.
Insights contain information related to the opportunity, like the associated organization and contact or proposal project, as well as additional information about the opportunity itself, like the forecast sales information and assessment. All insights were created by Autotask and cannot be reconfigured. They also do not contain any editable fields, although many contain hyperlinks that open the pages where the related entities can be modified.
If there are no insights chosen for an opportunity category, the main panel will take up the space where the insights would normally be displayed.
You can expand or collapse each insight. This setting is remembered from one session to the next.
NOTE For information on available insights and how to add them to an opportunity category, refer to Opportunity insights.
NOTE Your security permissions determine if data is displayed as plain text or as a hyperlink that allows you to open and view the associated entity.
The opportunity accessory tabs are located at the bottom of the main panel area. The following accessory tabs are available:
For comprehensive information about accessory tabs, refer to Accessory tabs.
The New and Edit pages for each entity feature a notification panel that is accessed from a persistent handle at the bottom of the page.
For more information, refer to Notification panel.


