The Organization page
PERMISSIONS Security level with access to CRM. Your security level may not allow access to all organizations.
NAVIGATION Left Navigation Menu > CRM > Search > Organizations > click Search > click on an organization name.
NAVIGATION My > CRM > Organizations. This search page returns only organizations for which you are the account manager or an account team member.
To open the page, use the path(s) in the Security and navigation section above.
The Organization page is a highly customizable view of an organization record in your Autotask instance that provides access to all data associated with the organization, including the following:
- Organization locations and sub-organizations
- Contacts
- Sales activities and quotes
- Tickets and projects
- Tax information, contracts, and invoices
- Documents and file attachments
- Financial reports
- Settings for invoices, quotes, and sales orders
For information on the general page layout and common elements on all entity pages, refer to Entity Page Layout.
Detail and Dashboard views
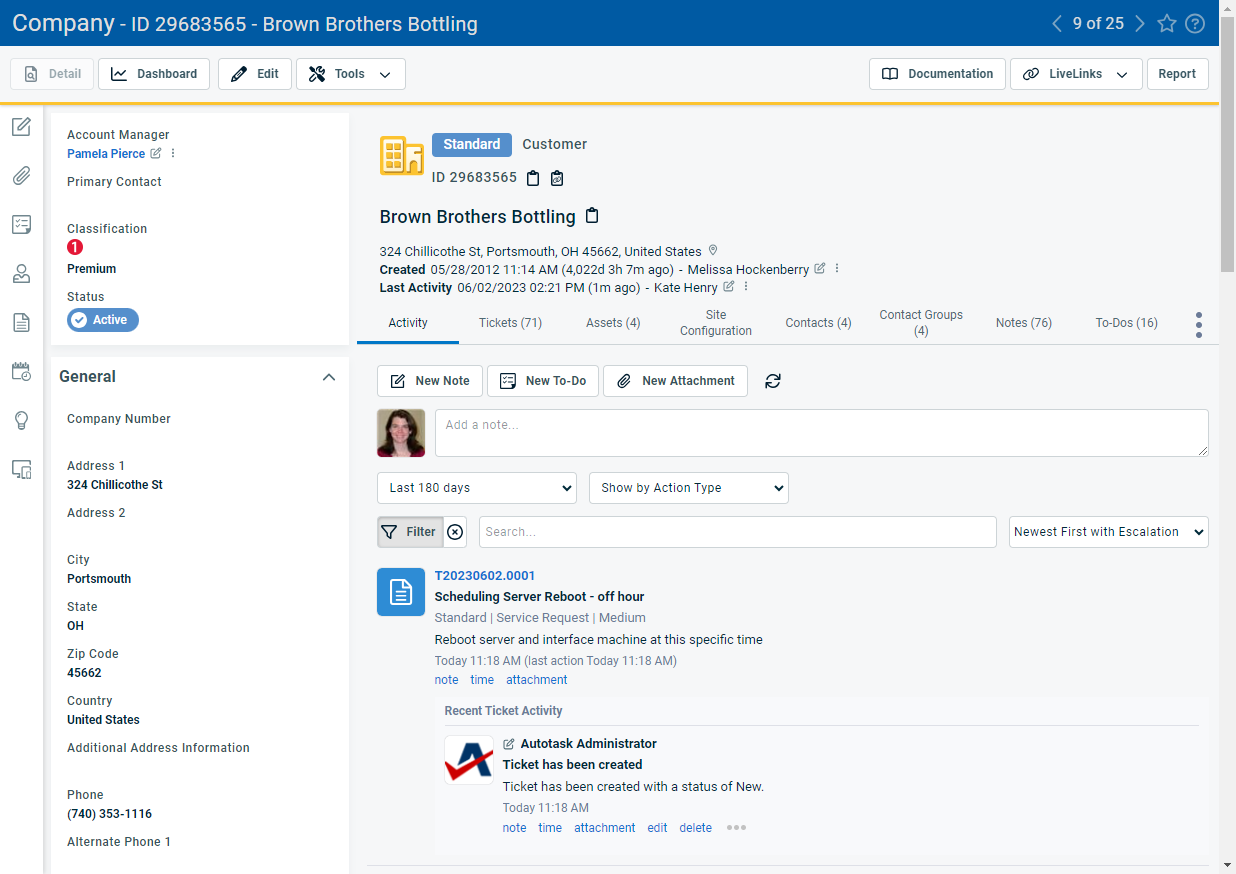
The Organization page has two distinct views: the Detail view and the Dashboard view. You toggle between the two views using a button on the task bar.
Detail view:
Dashboard view:
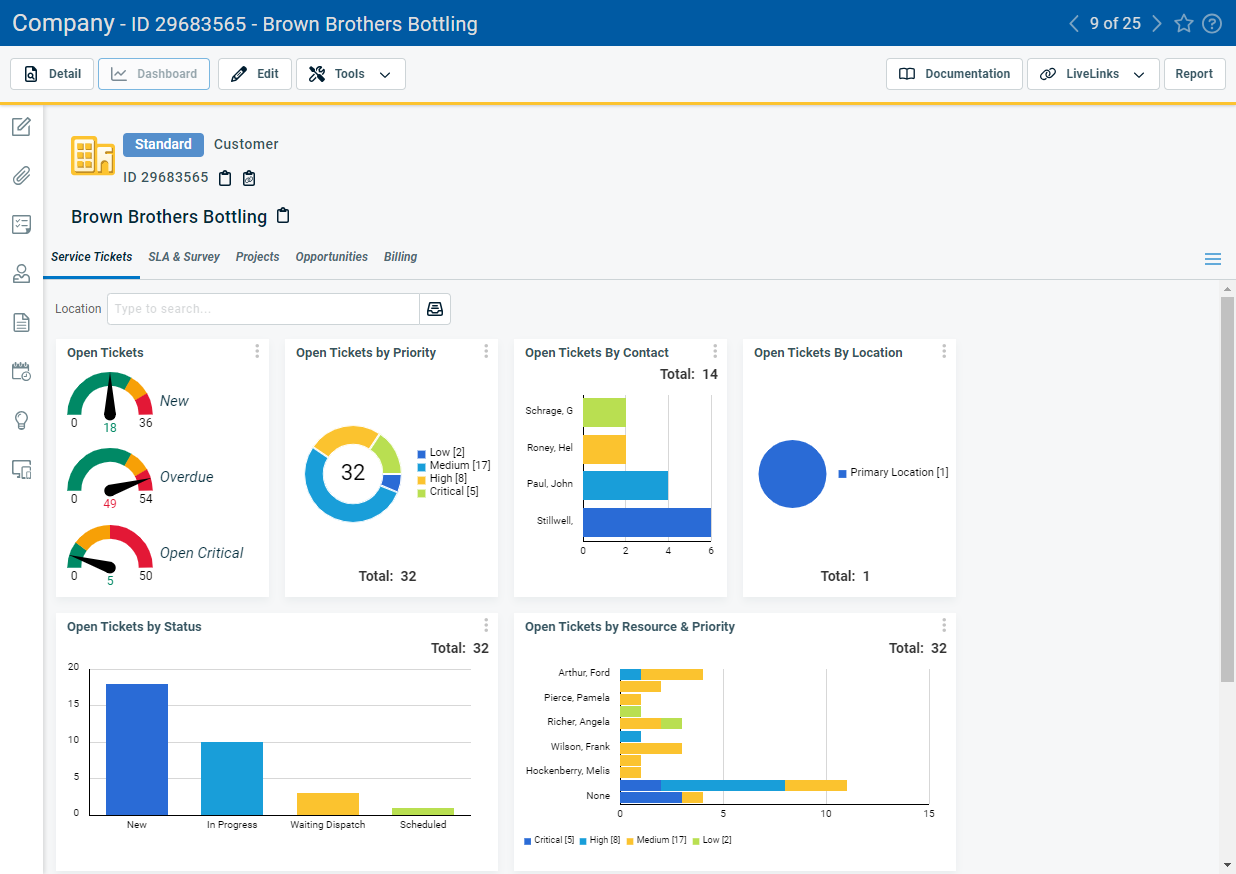
For more on the Dashboard view, refer to The Dashboard view.
For elements all entities have in common, refer to The top of the page.
| Name | Description |
|---|---|
| Detail/Dashboard toggle button |
To switch between the Detail and Dashboard views of the Organization page, click the enabled half of the toggle button. For information on the Dashboard view, refer to The Dashboard view. If there are no active organization dashboard tabs, this button is disabled. |
| Edit | Click Edit to put the Organization page into Edit mode. Refer to Editing an organization. |
|
Tools |
Refer to Tools menu. |
|
Documentation Manager |
Click to open the Documentation Manager page for this organization. Refer to The Documentation Manager. NOTE The Documentation Management functionality is included in the Autotask Premium edition and the Ultimate edition. For customers with the Essential edition, the Document Management module is disabled. |
| LiveLinks | Click to view a list of the LiveLinks available to you from this page. Refer to LiveLinks. |
| Report | Click to open a report of organization details to review, print, or save as an HTML file. Refer to Organization profile. |
| Option | Description |
|---|---|
|
Organization History |
Click to open the Organization History page. Refer to Entity History. |
|
Won Opportunity |
Click to launch the Won Opportunity Wizard. Refer to Closing opportunities you have won. |
|
Lost Opportunity |
Click to close an opportunity you have lost. Refer to Setting an opportunity as lost. |
|
Reassign Lead |
Launch the Reassign Lead Wizard to reassign the Opportunity Owner, Account Manager, Territory, and Classification at the same time. Refer to Reassigning opportunities |
|
Convert Organization to Location |
Select this option to convert an independent sub-organization to a location of the parent organization. This option is enabled on organizations that are sub-organizations. Refer to Converting a sub-organization to an organization location. |
|
Cancel Organization |
Refer to Canceling an organization. |
|
Document Merge |
Merge selected data fields from the current organization record into a document template to create a PDF document. Refer to Creating documents with Document Merge. |
|
Manage Integrated Customer Billing |
This will open a modal window where you select the organizations in other Kaseya modules that will be invoiced through the current Autotask organization. Refer to Mapping module organizations on the Organization page. NOTE All users with access to the Organization page can see this Tools menu item and open the mapping dialog. |
|
Enable Co-management Disable Co-management |
This option allows you to enable or disable co-management for the selected organization.
NOTE If a co-managing user is associated with a parent organization or a sub-organization and is supporting all sub-organizations, the sub-organizations and the parent organization must also be enabled for co-management.
|
|
View/Create Datto RMM Site |
Only displayed if the Advanced Datto RMM Integration is enabled. Click to view the mapped site in Datto RMM or to create a new site. |
|
Reset QuickBooks Organization Mapping |
This option is available only if you use QuickBooks Desktop, the organization record has been transferred to QuickBooks, and a QuickBooks ID has been returned to map the Autotask organization to the QuickBooks organization. Refer to Autotask to QuickBooks Mapping. To clear this mapping, select Reset QuickBooks Organization Mapping. |
|
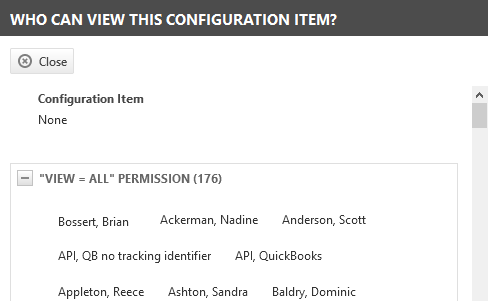
Who can view this Organization? |
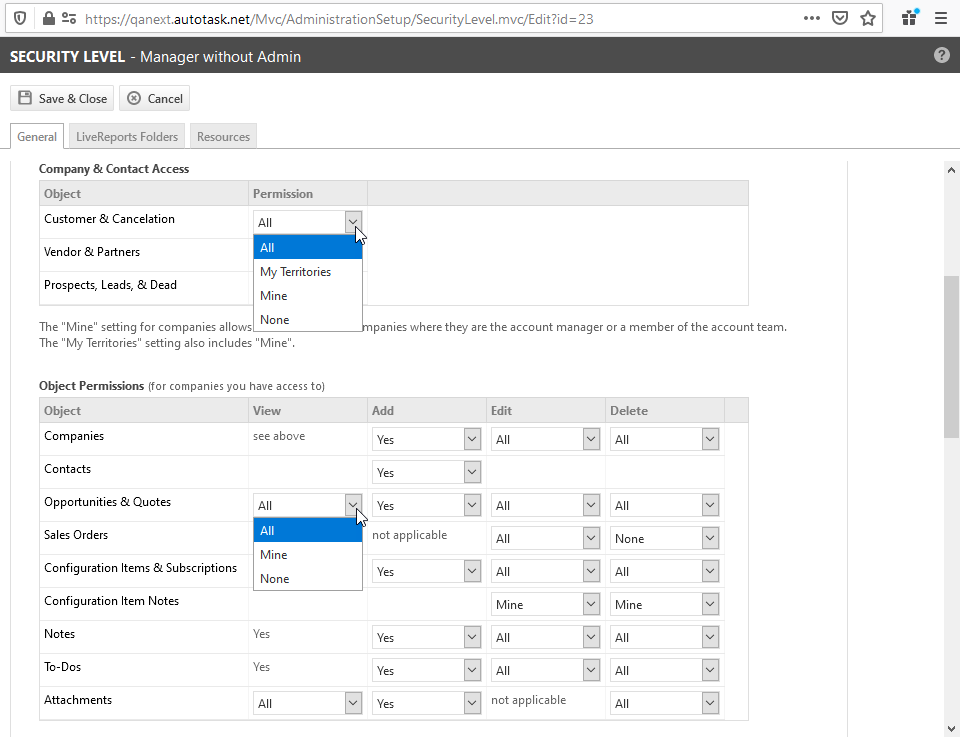
On the Tools menu of organizations, devices, opportunities, and sales orders, a Who can view this [entity name] link appears. Click this link to learn which users have permission to view this item. View permissions for organizations are determined by the Organization & Contact Access settings of the user's security level, and for opportunities, sales orders, and devices, by the Object Permissions. Refer to CRM security settings. |
Any messages or banners associated with the organization, such as organization alerts, appear above the panels. For more information on creating and managing organization alerts, refer to The Organization and Contact Alerts tabs. 
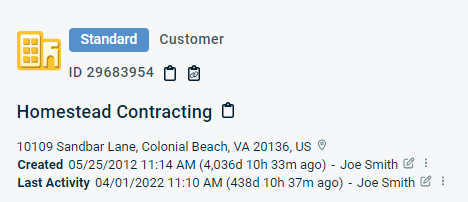
At the top of the main panel area, the following field information is displayed:
| Field | Description |
|---|---|
|
Organization Category |
The [Entity] Category field appears on all entity pages for which categories can be configured. They determine the layout and the options on the entity:
Refer to Introduction to Categories. Subject to security permissions, select a category for the organization. |
|
Organization Type |
The organization type describes your company's relationship with another organization. Organization types are pre-defined; they cannot be modified or added to. Options include the following:
The organization type imposes some restrictions:
|
|
Organization ID |
A unique, Autotask-assigned numeric identifier that cannot be edited or deleted. |
|
Organization Name |
Organization or Organization Name refers to the organization associated with the entity. This field is always required.
For this field, you can select a different local term. In your Autotask instance, it may be labeled Account, Business Unit, Client, Company, Customer, Organization, or Site. Refer to Selecting a currency and local terms and symbols. |
|
Quick Copy buttons |
There are four Quick Copy buttons on the Organization page:
|
|
Created (Detail view only) |
This field appears on many entities. It tracks the date and time an entity was created, or imported into, Autotask. It is system-generated and cannot be edited. For some entities, it is not exposed in the UI, but it is available in reports and in the API. Often, date/time variables calculated from the date/time stamp are available in multiple formats. Examples:
|
|
Last Activity (Detail view only) |
Last Activity is a composite field that displays the last activity date and time, how long ago that date/time was (based on the time you opened the page), as well as the user associated with the activity. It is updated when certain actions occur on the main entity or on associated entities. For an overview of actions that update the Last Activity date on various entities, refer to The Organization page. |
Refer to Quick Add bar.
The Detail view
The Details panel is located to the left of the Main panel. It contains a fixed header and additional sections that can be expanded and collapsed. Refer to The Details panel. For field descriptions of fields that can appear in Details panel sections, refer to Adding an organization.
The Organization page, as the nexus of information for a customer, has many more accessory tabs than other entities. They fall into several groups:
The Activity tab
The Activity tab is the working area of the entity. You can view notes, attachments, and other associated items that have been added to the entity, and create new ones. Refer to The Activity tab.
Associated entities
These tabs show tables of entities associated with the organization. Always depending on security permissions, you will see the list of all items (contacts, tickets...) associated with the organization. It is as though you performed a search on the Search page, with the organization as the filter. The accessory tab tables and the Search pages also generally share the same powerful context menu. The following associated entities can be accessed:
- The Attachments tab
- The Co-management tab
- The Contact Groups tab
- The Contacts tab
- The Contracts tab
- The Devices tab
- The Invoices tab
- The Invoice settings tab and page
- The Locations tab
- The Notes tab
- The Opportunities tab
- The Projects tab
- The Sales Orders tab
- The Sub-Organizations tab
- The Tickets tab
- The To-Dos tab
Configuration pages
Some accessory tabs contain pages where you configure features at the organization level.
- The Purchase Order Settings tab
- The Quote Settings tab and page
- The Invoice settings tab and page
- The Organization and Contact Alerts tabs
- The Site Configuration tab
Financial Reports
The third type of accessory tabs provide access to financial and profitability reports for the organization.
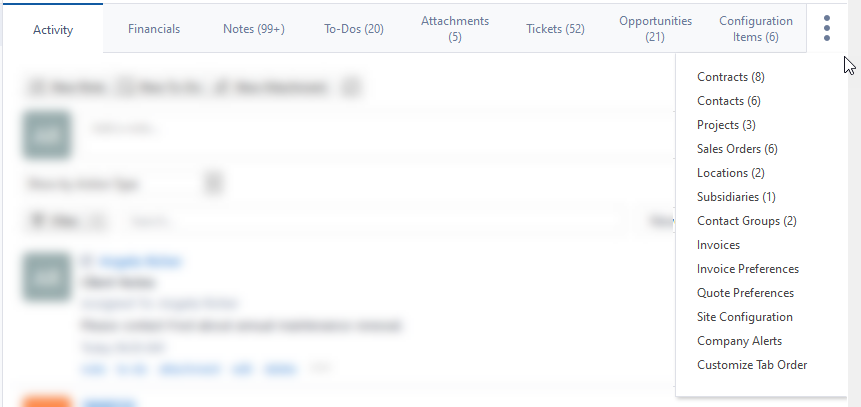
With so many accessory tabs available on the Organization page, each user can configure which accessory tabs they want to make visible and the order in which they will appear on the tab strip. Including the Activity tab, up to eight tabs can appear at the same time. All others you have selected can be accessed from the More![]() menu.
menu.
To manage which tabs will be visible, do the following:
-
Click the More
 menu and select Customize Tab Order. A dialog window will open.
 -
To display a tab, move it to the Selected Tabs list. To hide a tab, move it to the Available Tabs list.
-
To determine the display order, use the Up and Down arrows next to the Selected Tabs list.
PERMISSIONS If the user’s security level has None view permission, the tab will be hidden from the tab strip and from the Customize Tab Order dialog.
The Dashboard view
The Organization Dashboard view is a more visual way to view organization data. You access it from the Organization page by clicking the Dashboard toggle button on the action button bar.
On the Dashboard view, click the Detail button to return to detail view.
Initially, the Organization Dashboard page is set as your default view, but you can revert to the Organization page with a selection on your Settings page. Refer to Settings.
The tabs you see on the organization dashboards are either system tabs created by Datto or tabs created and shared by your Autotask administrator. Refer to Creating and managing organization dashboards.
Organization dashboard tabs act like shared tabs. Regular users cannot create organization dashboard tabs or add widgets. Because of this, all users with View permissions for a given organization will see the same tabs, widgets, and data.
The data is always filtered by the selected organization.
Organization/Sub-organization filter
If an organization is either a parent organization or a sub-organization of another organization, the Organization filter is displayed. The drop-down filter contains the following options:
| Filter | Description |
|---|---|
| Organization (default) | Widgets are filtered to display data for the selected organization. |
| Parent Organization (on sub-organization only) | Widgets are filtered to display data for the selected organization's parent organization. |
|
Combined filters (on both parent and sub-organization) |
On the parent organization, you can select either the parent organization and sub-organizations, or the sub-organizations only. On the sub-organization, you can select the current sub-organization and the parent, or the parent organization and all sub-organizations. |
|
Sub-Organizations (on parent organization only) |
Shows a list of all sub-organizations. Click on a sub-organization name to filter the widgets by the selected sub-organization. |
Location filter
If the organization or sub-organization displayed in the organization filter has locations, you can select them in the Location filter. The location filter is disabled if any of the combined organization filters are selected.
On the right of the tab bar, a tab menu allows you to do the following:
| Option | Description |
|---|---|
|
Refresh |
The organization dashboard is automatically refreshed every 5 minutes, but you can force a refresh by clicking the Refresh icon in the tab menu. |
|
Reset Tab Order |
Tabs can be reordered on the tab bar using drag and drop. Select this option to reset the tab order to the default order. |
|
Tab Settings |
Select this option to pick a different theme or to clear the Position widgets based on available space setting. |
NOTE There is no option to close an organization dashboard tab.
The widgets on the organization dashboard tabs function just like widgets on application-level shared tabs:
- You can drill in to see the underlying data.
- You can open the widget menu and refresh the widget.
For general information about widgets, refer to About dashboard widgets.

